What Is a Splitboard?
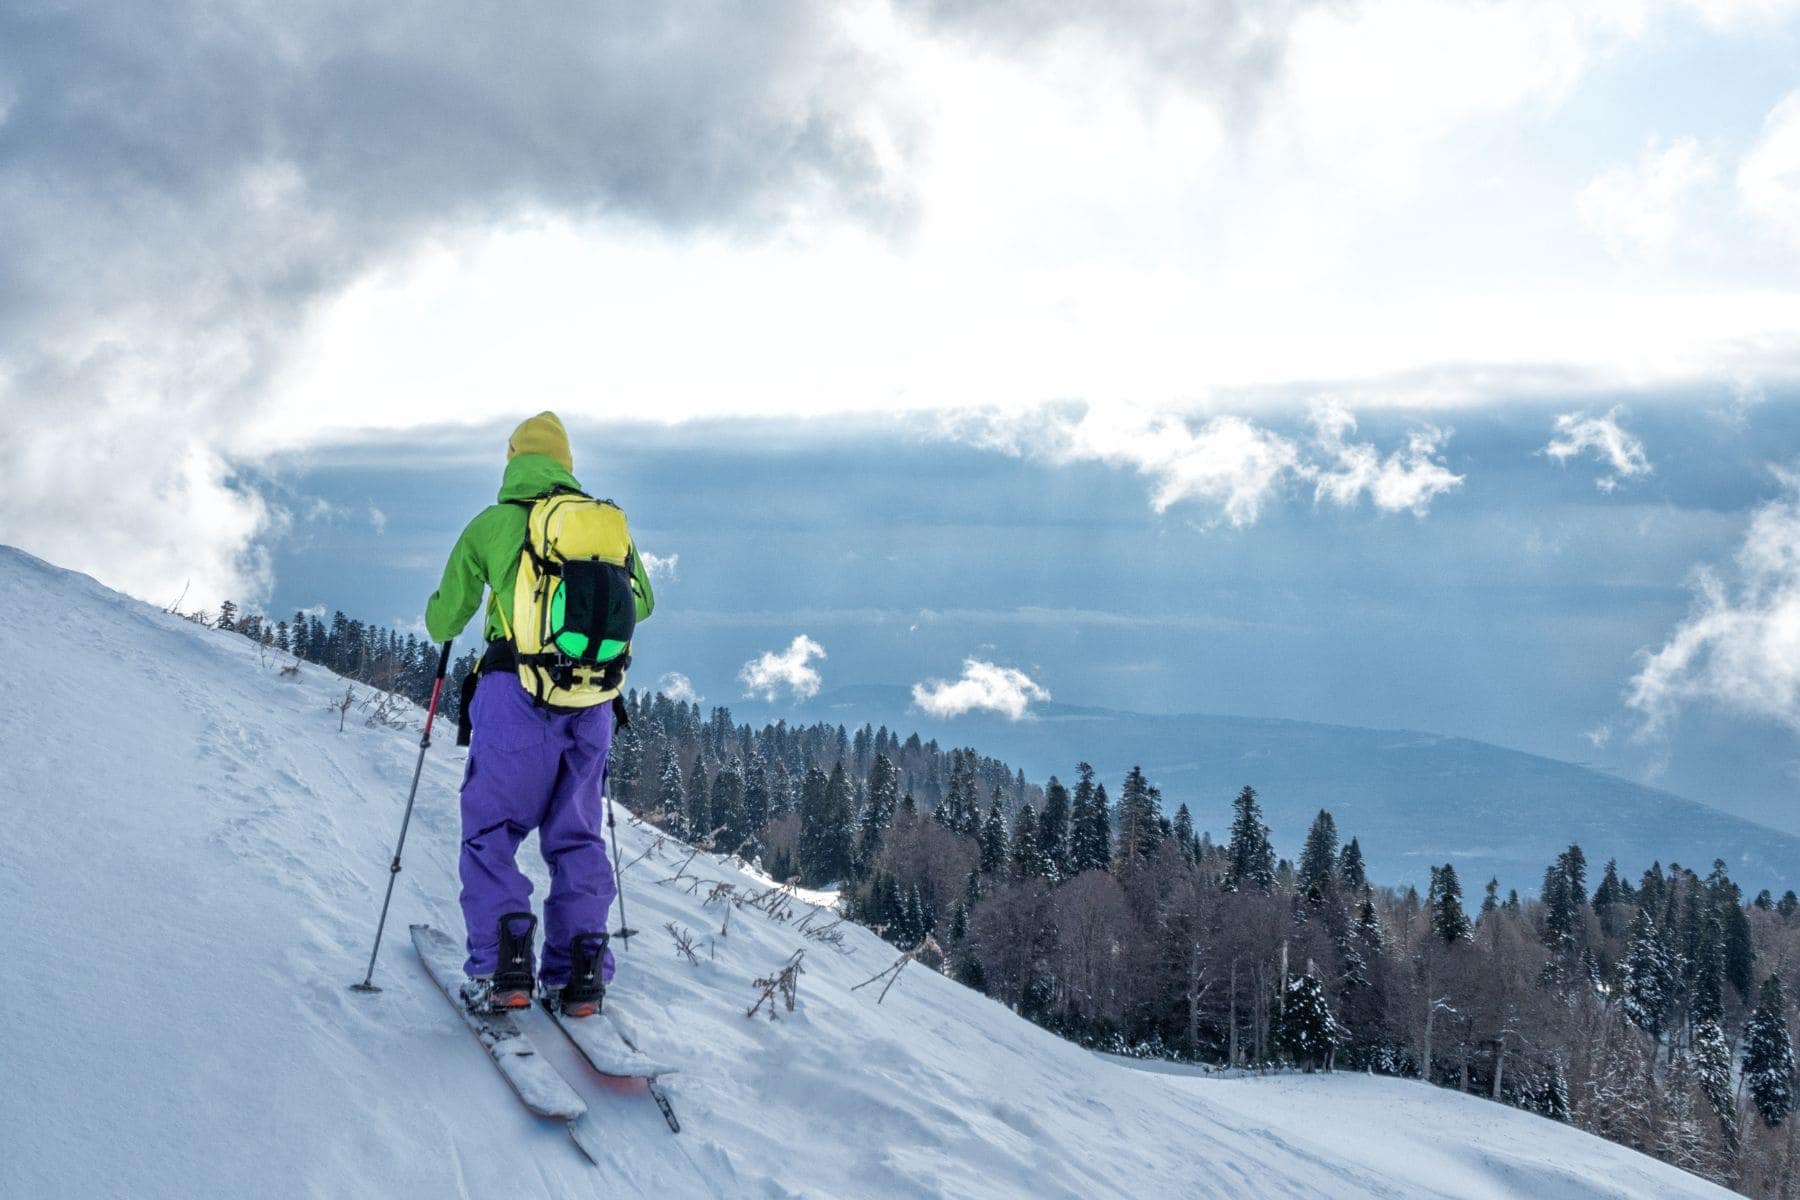
A splitboard is a specialized snowboard that can be separated lengthwise into two ski-like halves. With climbing skins attached to the bases and free-heel bindings, it transforms into a pair of touring skis for efficient uphill travel. At the top, the two halves are locked back together into a full snowboard for the descent.
Unlike a regular snowboard (which is essentially useless for ascending), a splitboard gives snowboarders the same human-powered access to the backcountry that skiers have long enjoyed with alpine touring setups.
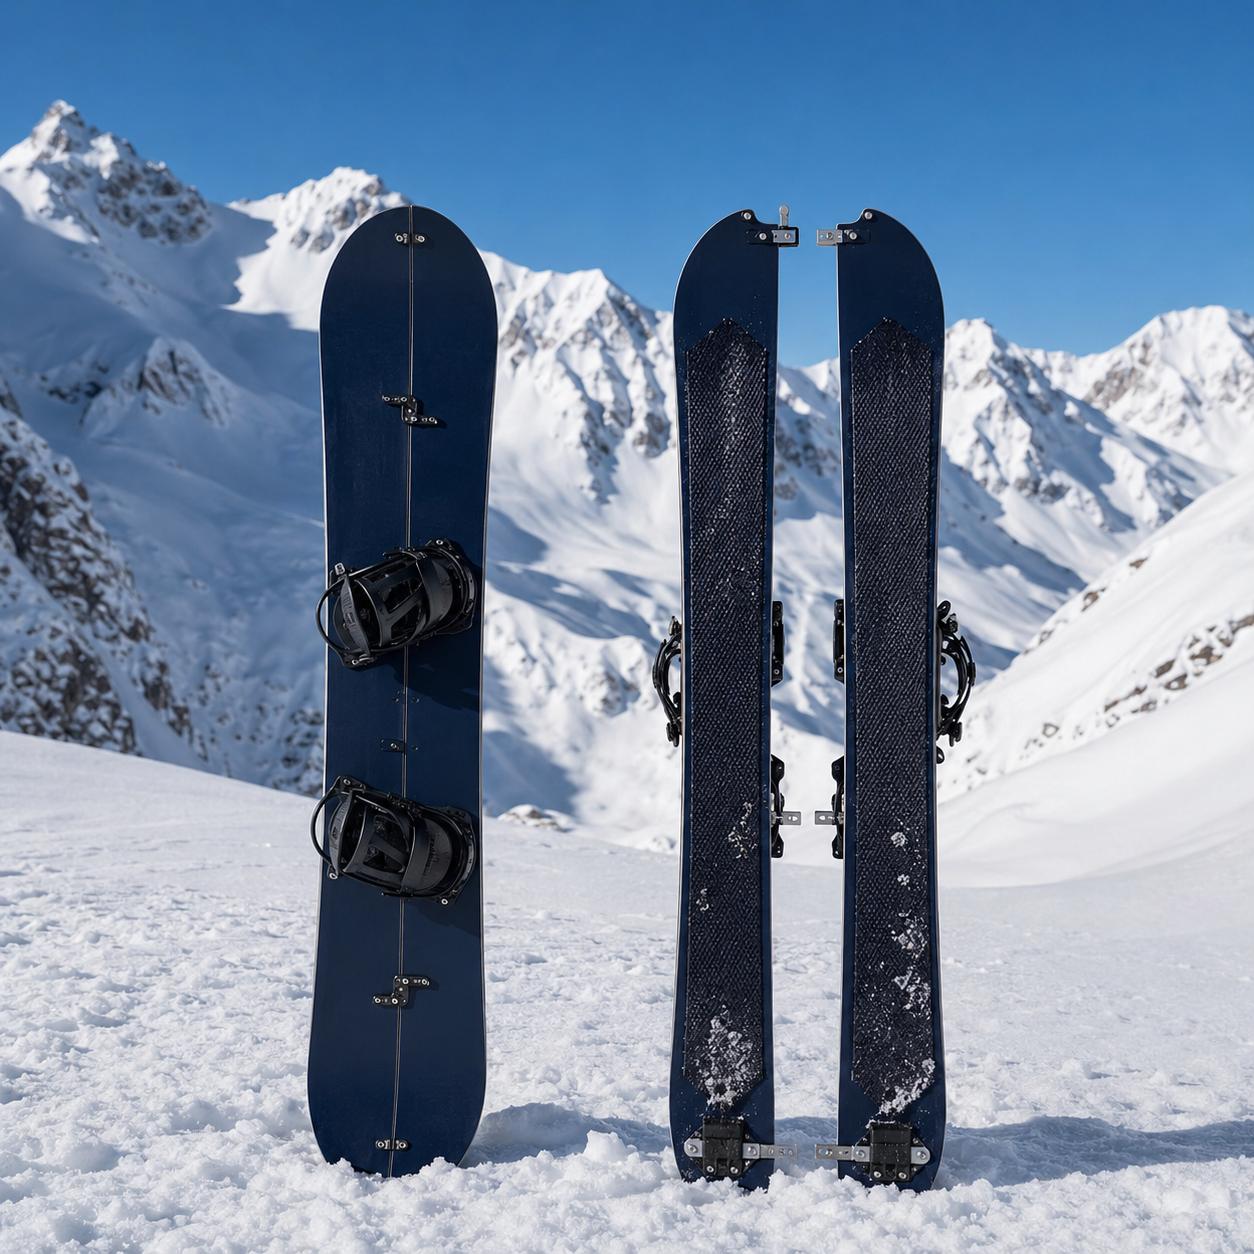
Ride Mode
The two halves lock together with clips and hooks. Specialized bindings are locked down for normal snowboarding.
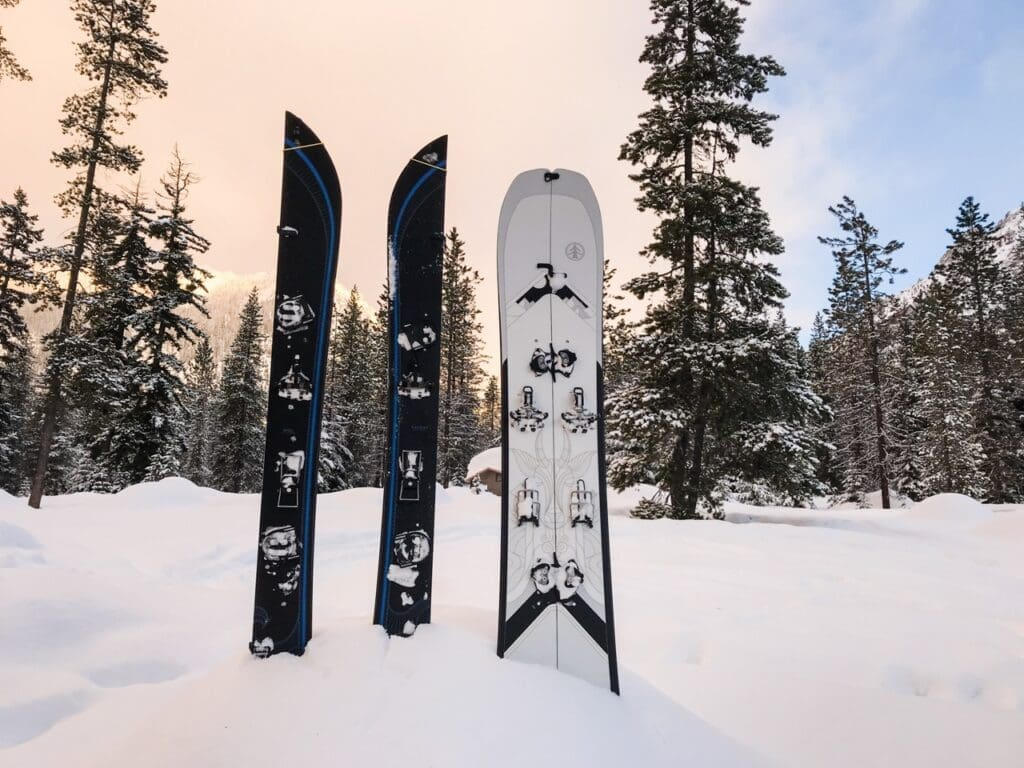
Tour Mode
Split apart, skins on the base, heels free. You skin uphill just like a ski tourer.
Splitboard vs Snowboard
At first glance a splitboard looks almost identical to a regular snowboard. The real difference only appears when you need to go up.
Good news: In most cases you can keep using your existing snowboard boots with a splitboard — they are compatible. You usually do not need to buy new boots.
Regular Snowboard
- One solid board
- Optimized purely for downhill
- Lighter & simpler
- Best for resorts & park
- Cannot efficiently climb
- Standard bindings
- No skins or touring hardware
Splitboard
- Splits into two ski halves
- Designed for uphill + downhill
- Slightly heavier with hardware
- Perfect for backcountry
- Skins up like a ski tourer
- Specialized free-heel bindings
- Clips, hooks & inner edges
Modern splitboards ride extremely well in powder. Many riders say the difference is barely noticeable once you’re on the descent. The trade-off is a bit of extra weight, more hardware, and a short learning curve for transitions and skinning.
How It Works
Key components include:
- Split hooks & clips – Secure the two halves into a solid snowboard.
- Climbing skins – Directional fur that glides forward but grips on the way up.
- Specialized bindings (Spark R&D, Voile, Karakoram, etc.) – Switch between free-heel touring and locked-down riding.
- Inner edges – Extra metal edges down the center for grip while skinning.
Climbing Skins Explained
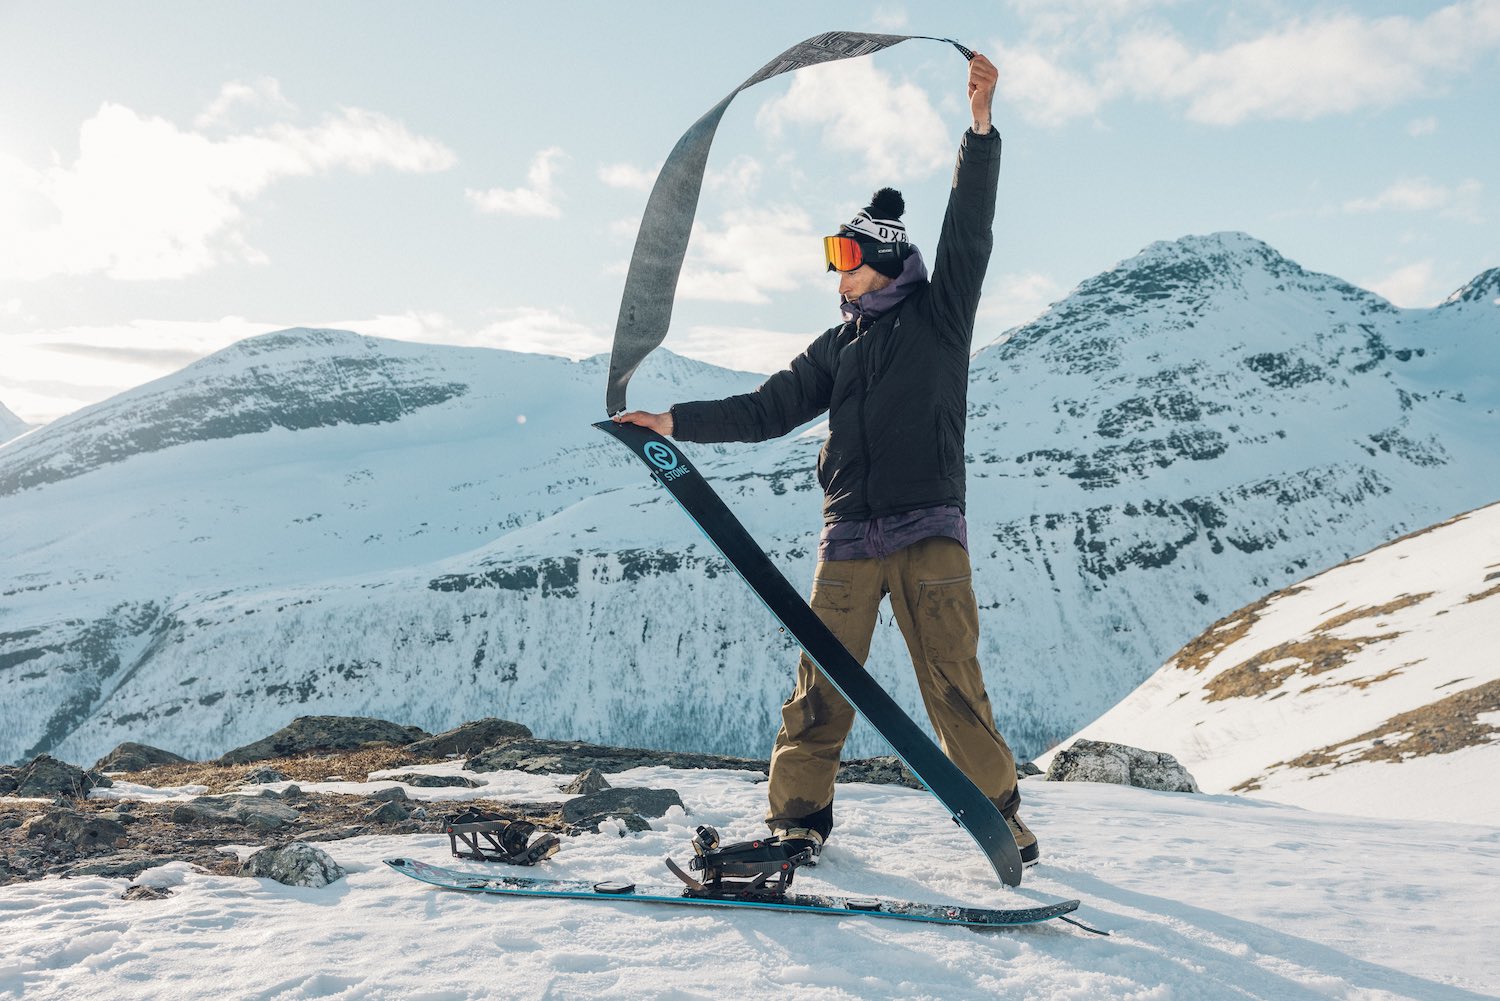
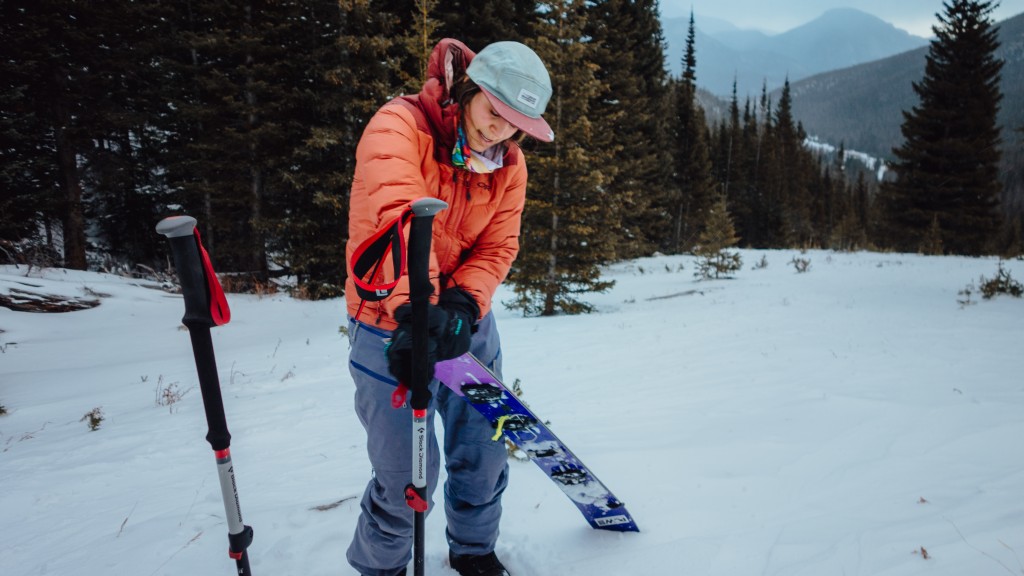
Climbing skins are the secret weapon that turns a splitboard into a true touring machine. They are long strips of fabric with directional “fur” that stick to the base of each splitboard half (in ski mode).
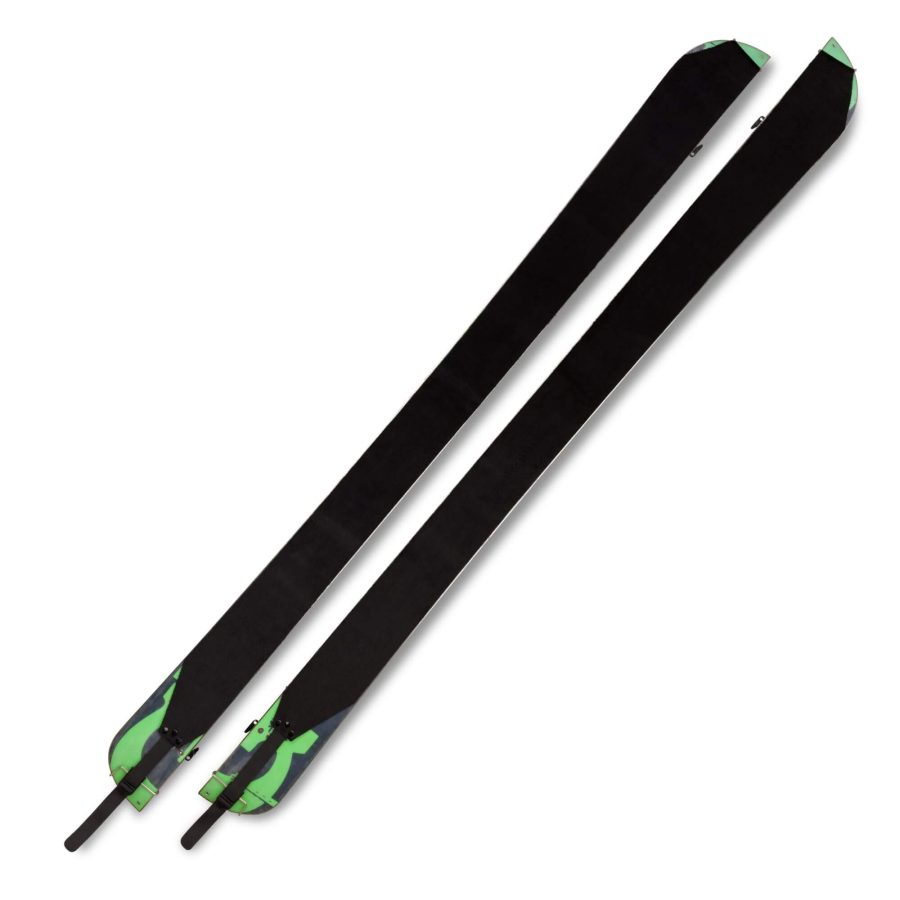
Attachment
Skins have a sticky glue side that adheres to the board base, plus tip and tail clips/hooks for security so they don’t peel off mid-climb.
Materials
- Nylon – Maximum grip & durability, slightly slower glide
- Mohair – Excellent glide & lighter weight, less grip on hard snow
- Blends – The sweet spot for most riders (e.g. 70/30 mohair/nylon)
You size skins to the length of your splitboard and usually trim the width for a clean fit. Proper glue care, drying them after use, and storing them skin-to-skin keep them performing season after season. Without good skins, efficient uphill travel on a splitboard is nearly impossible.
Splitboard Binding Compatibility
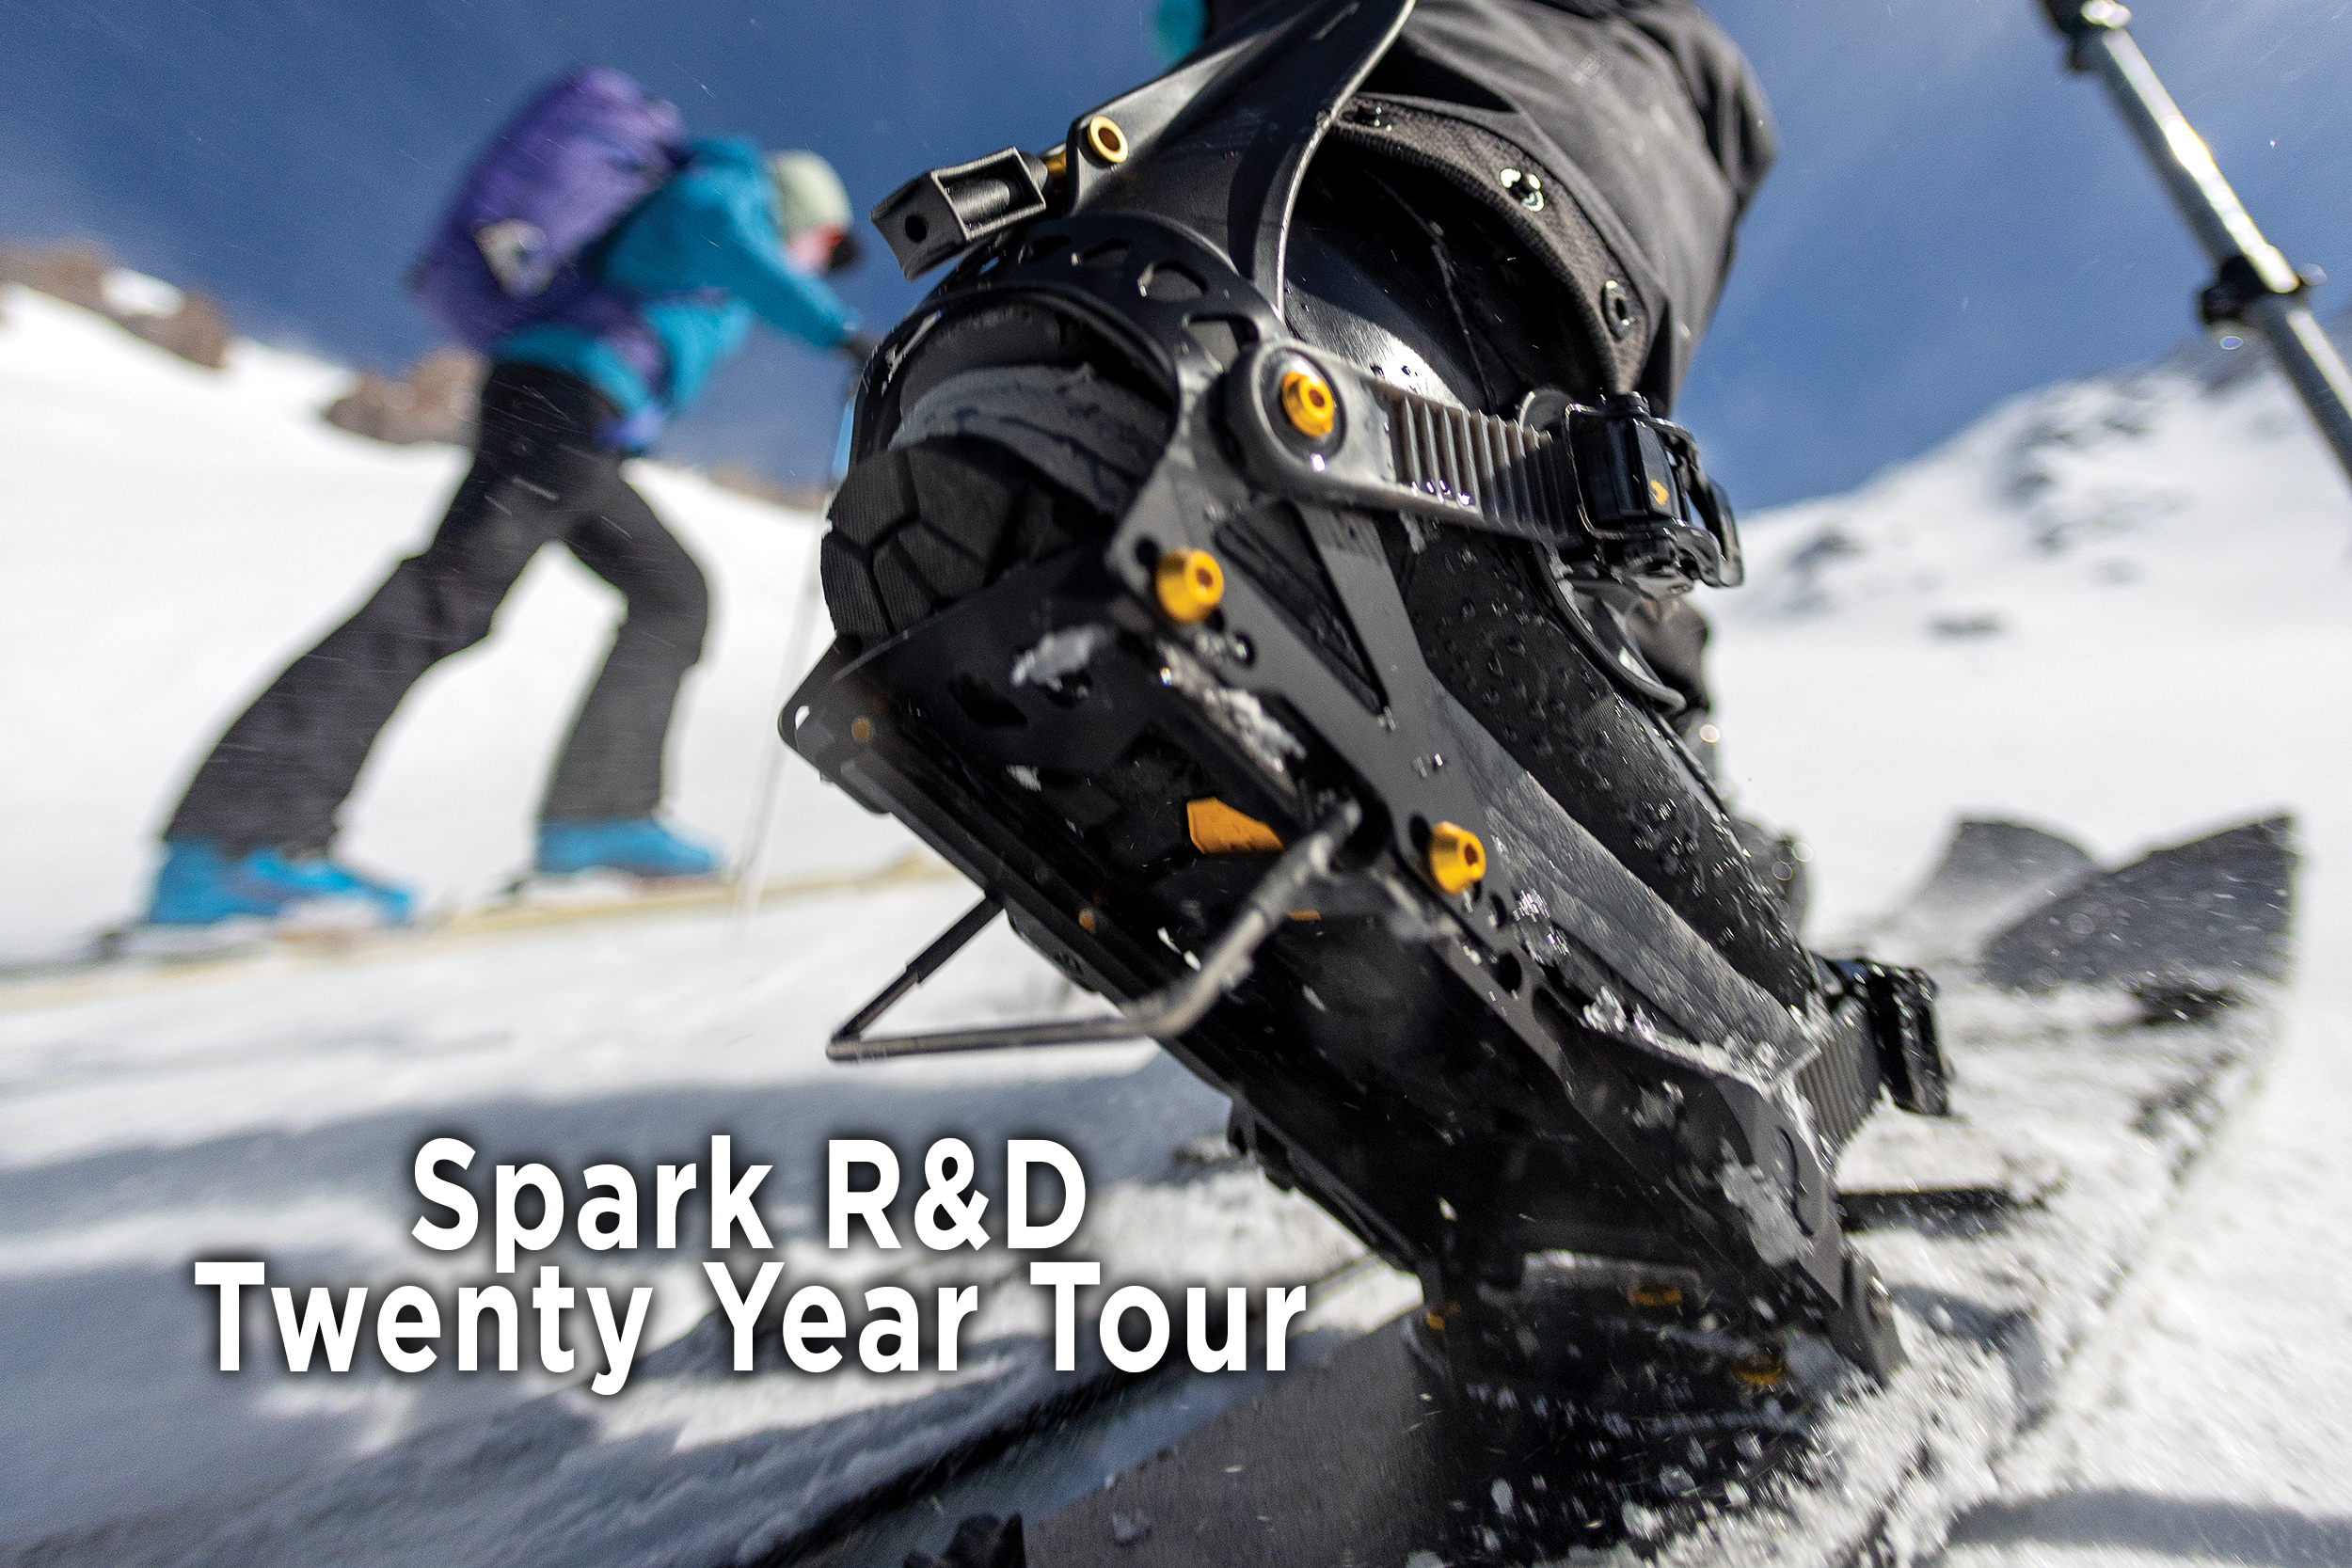
Splitboard bindings are specialized — they must work in both touring mode (free heel for skinning) and ride mode (locked down for snowboarding). Compatibility is mainly about the interface system that connects the binding to the board.
Puck Systems (Spark & Voile)
- Metal or plastic pucks bolt into the board inserts
- Bindings slide on and lock
- Works with nearly all factory splitboards
- Spark Tesla / T1 and Voile systems are widely cross-compatible
- Also supports Burton Channel pucks on many models
Proprietary Systems (Karakoram)
- Uses its own interface / clips
- Requires Karakoram-compatible pucks or mounting
- Many boards come pre-drilled or with adapters
- Excellent board feel and fast transitions
- Less universal than puck systems
High Compatibility
- Spark R&D (most popular)
- Voile
- Many Nitro / Burton collab models
- Standard 4×4 & 2×4 boards
Brand-Specific
- Karakoram Prime Connect
- Some Union Charger variants
- Older or hardboot systems
- Always check board inserts
Before buying bindings, confirm your board’s insert pattern and whether it includes pucks. Most new splitboards from major brands work with Spark or Voile out of the box. If you already own solid snowboard bindings, Voile hardware is one of the few ways to adapt them for split use — though dedicated split bindings perform better.
Sidecut Radius Explained
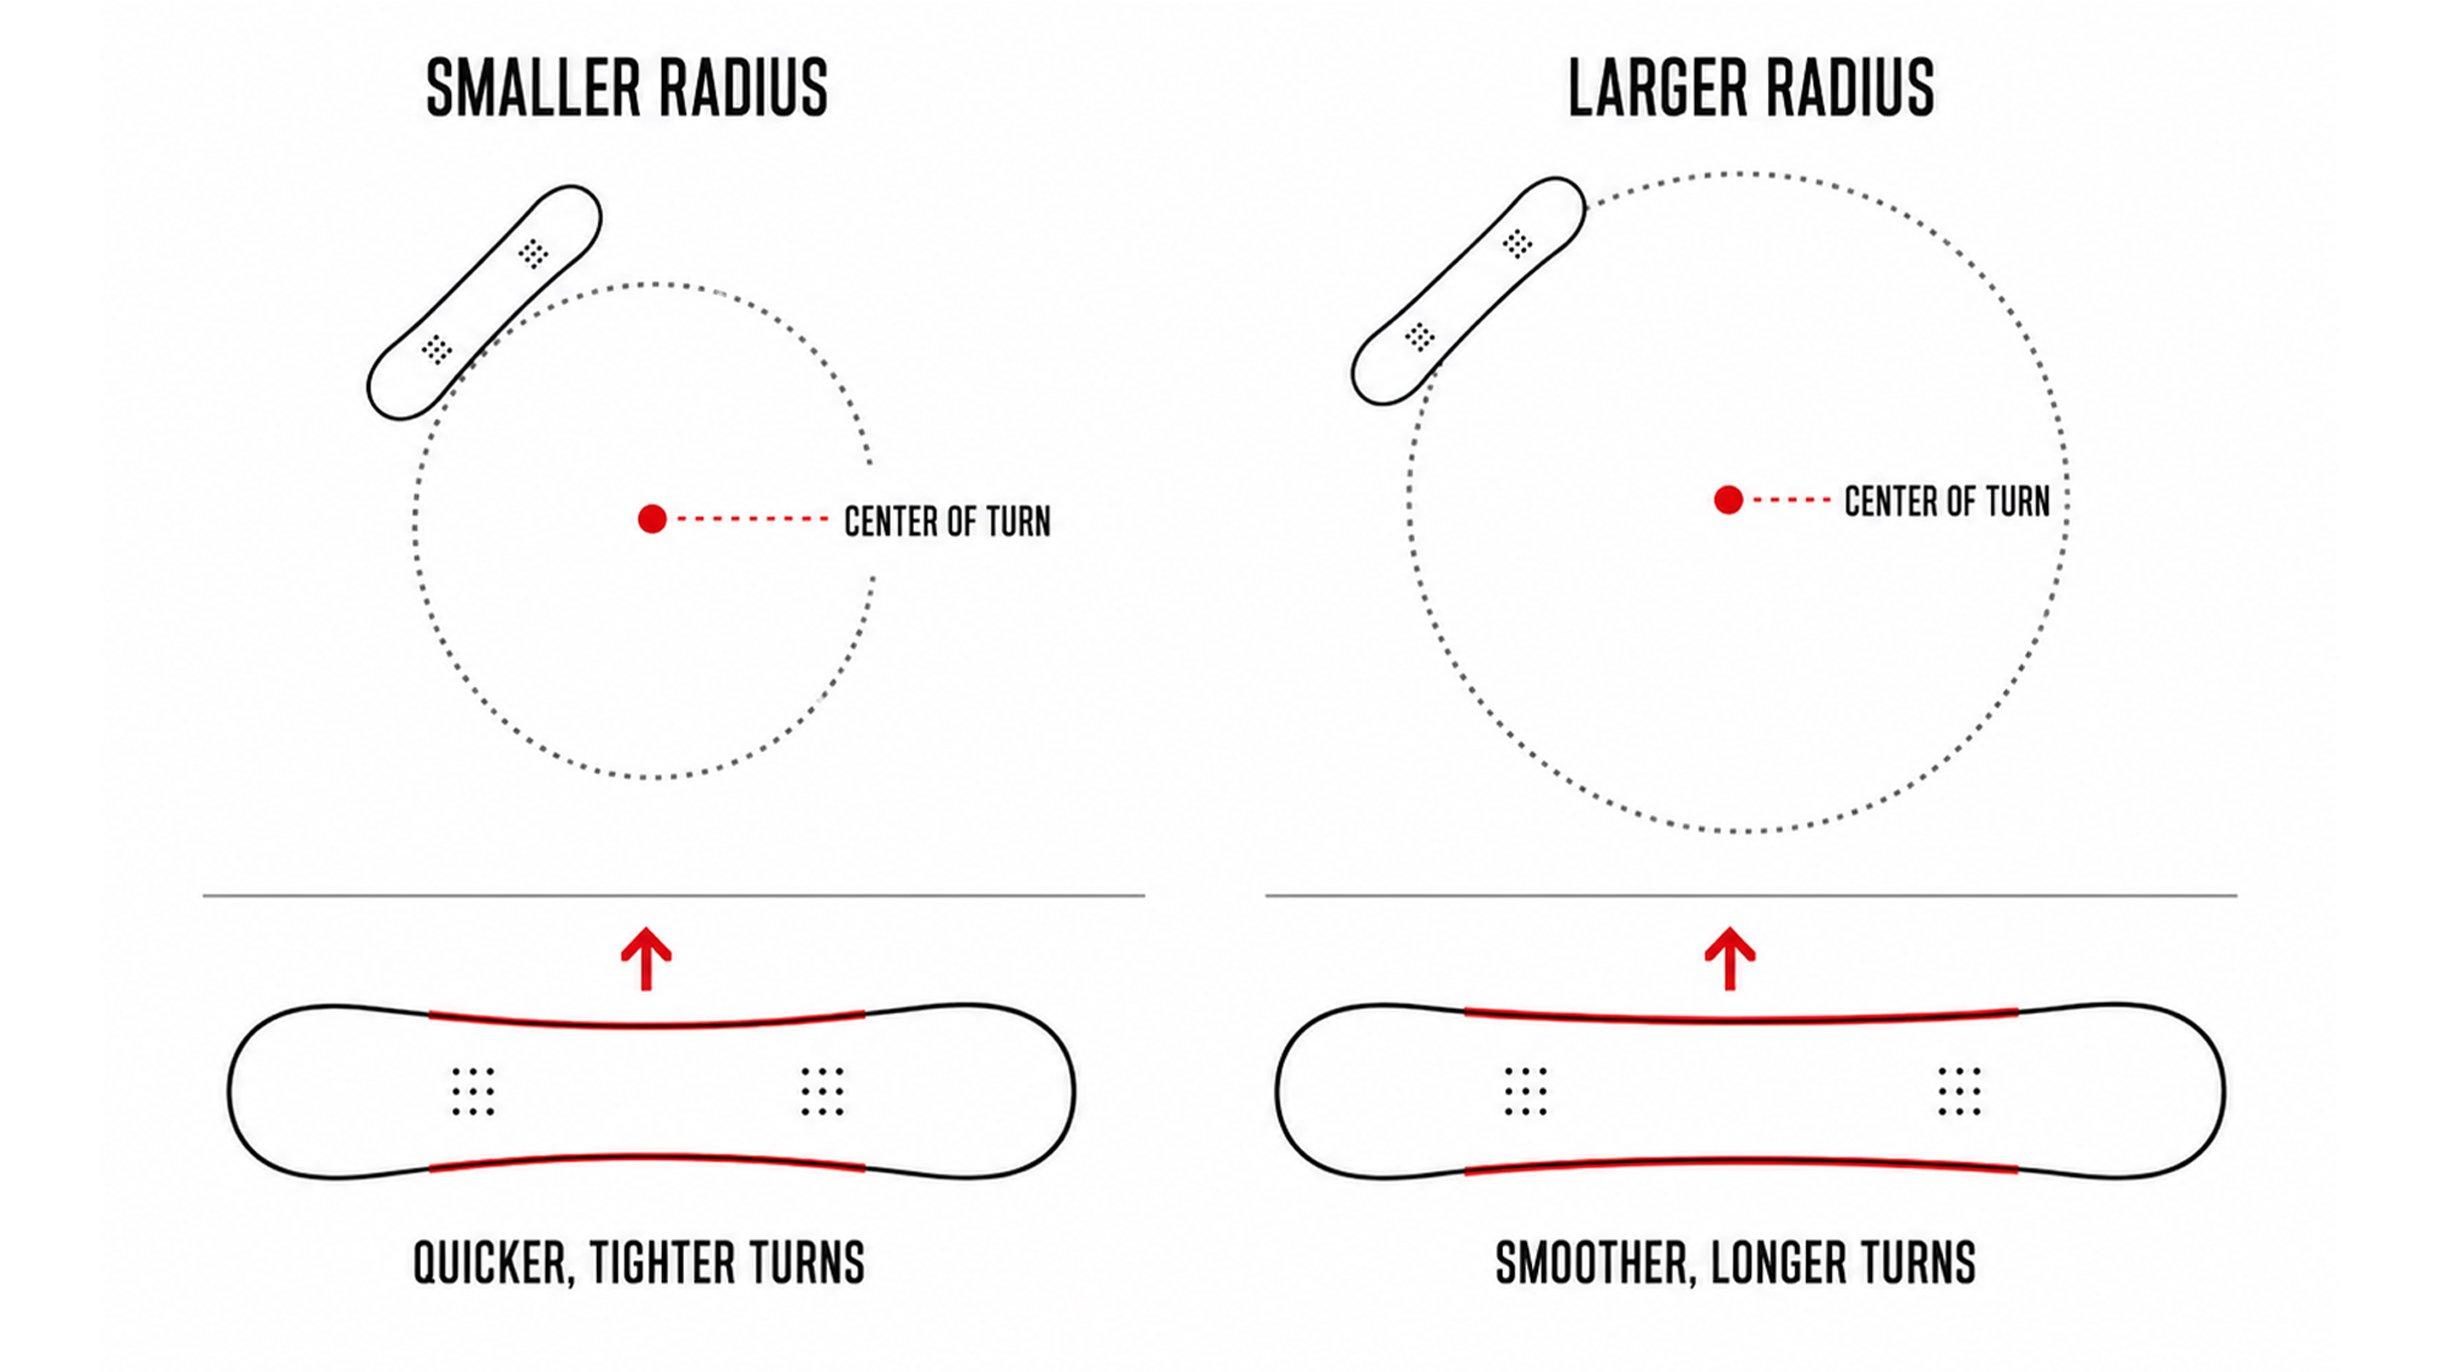
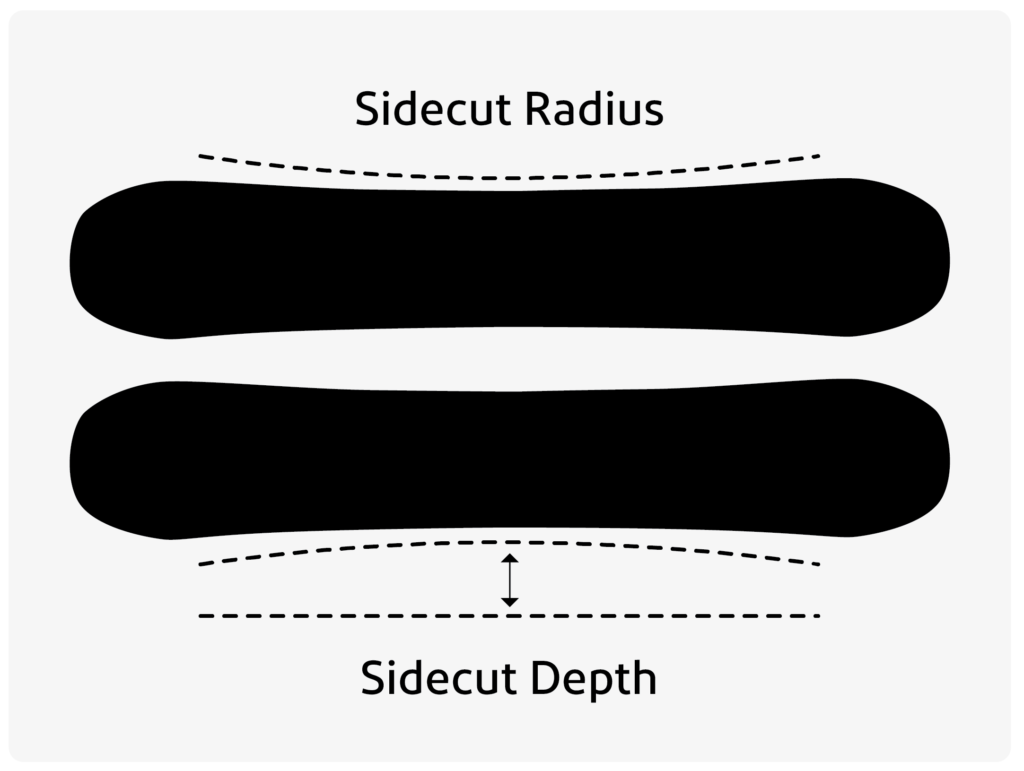
Every snowboard (and splitboard) has a sidecut — the curved shape of its edges. The board is narrower at the waist than at the tip and tail. Sidecut radius is the size of the imaginary circle that matches that curve.
• Smaller radius (e.g. 7–8 m) = deeper sidecut = tighter, quicker turns
• Larger radius (e.g. 9–11 m+) = shallower sidecut = longer, more stable turns
How it works
When you tilt the board on edge, it naturally wants to carve along the arc of its sidecut. A smaller radius carves a tighter circle; a larger radius carves a bigger, smoother arc.
What it means for riding
- Small radius – Quicker turns, better in trees, moguls, and tight terrain
- Large radius – More stability at speed, smoother carves, better for open powder fields
- Typical range – Most boards sit between 6 m and 11 m
On splitboards the sidecut works exactly the same as on a solid board once you’re in ride mode. Many freeride and powder-oriented splitboards lean toward a slightly larger radius for stability and float in deep snow, while all-mountain models often use a more moderate radius for versatility. You can still tighten a turn beyond the board’s natural radius by flexing the board harder.
Sidecut Depth
Sidecut depth is the physical measurement of how far the edge curves inward from a straight line drawn between the widest points of the tip and tail. It is the “depth” of the waist relative to the ends of the board.
• Deeper sidecut → smaller radius → tighter turns
• Shallower sidecut → larger radius → longer turns
Depth is not listed as a separate number on most boards (radius is the standard spec). However, depth is influenced by both the radius and the length of the effective edge. Two boards can have the same radius but different depths if one is longer. A deeper sidecut is visually obvious — the board looks more “waisted” or hourglass-shaped.
- Deep sidecut – Makes the board feel more responsive and easier to initiate sharp turns. Preferred by many park and technical freeride riders.
- Shallow sidecut – Feels more stable and planted, especially at speed. Common on big-mountain and powder boards.
- On splitboards – Same rules apply in ride mode. The shape is fixed once the board is locked together.
Effective Edge Length
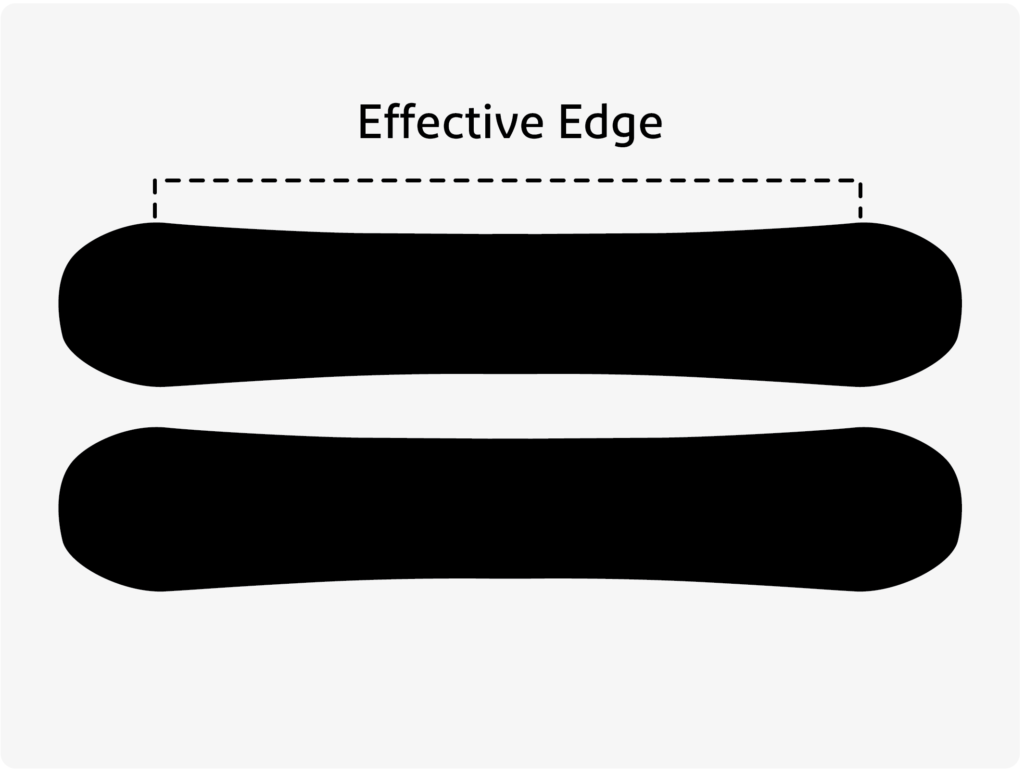
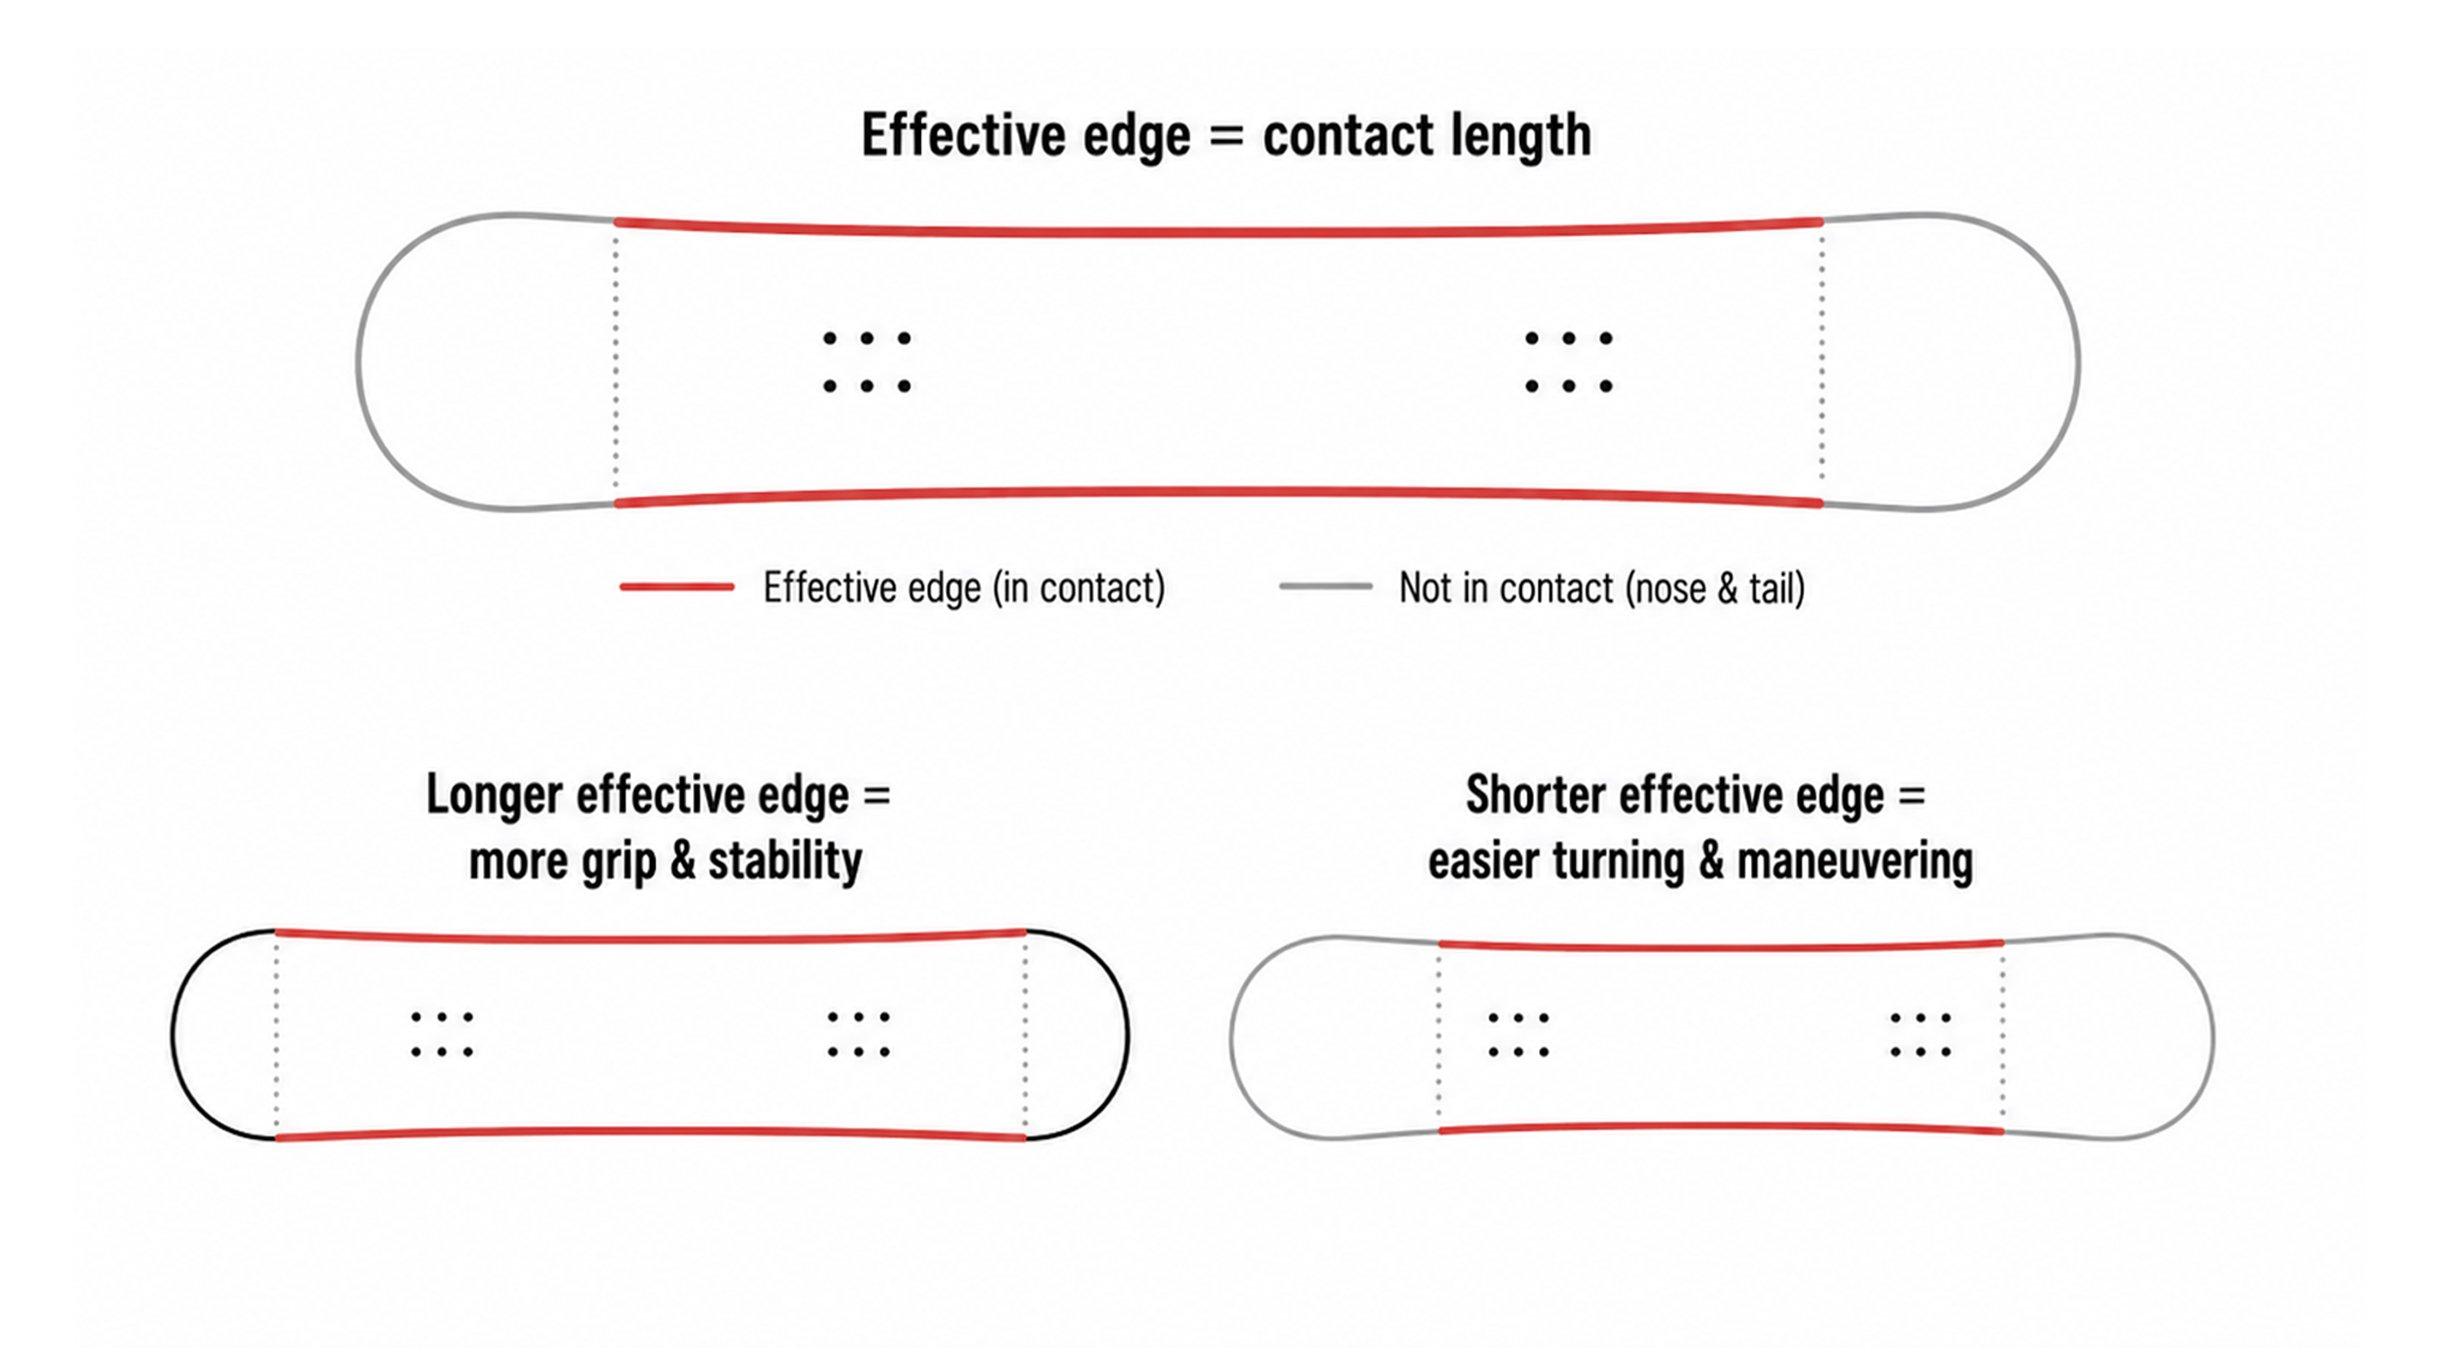
The effective edge is the length of metal edge that actually engages the snow when you’re turning on an edge. It runs from the widest point of the tip to the widest point of the tail — the portion of the edge that is in contact with the snow during a carve.
What affects it
- Overall board length
- Length of the tip and tail (longer noses/tails shorten the effective edge)
- Sidecut shape (slight influence)
- Camber/rocker profile (affects real-world contact)
Riding effects
- Longer EE – Better high-speed stability, more confident edge grip on firm snow
- Shorter EE – Easier to pivot, more playful, better for tight trees or technical lines
- On splitboards the same rules apply once locked in ride mode
Note that effective edge is different from contact length (or running length). Contact length is the straight-line distance between the two points where the board touches the snow when weighted and flat. Effective edge is measured along the curved edge and is always a bit longer. Most manufacturers list effective edge in millimeters on the board specs.
Camber vs Rocker Profiles
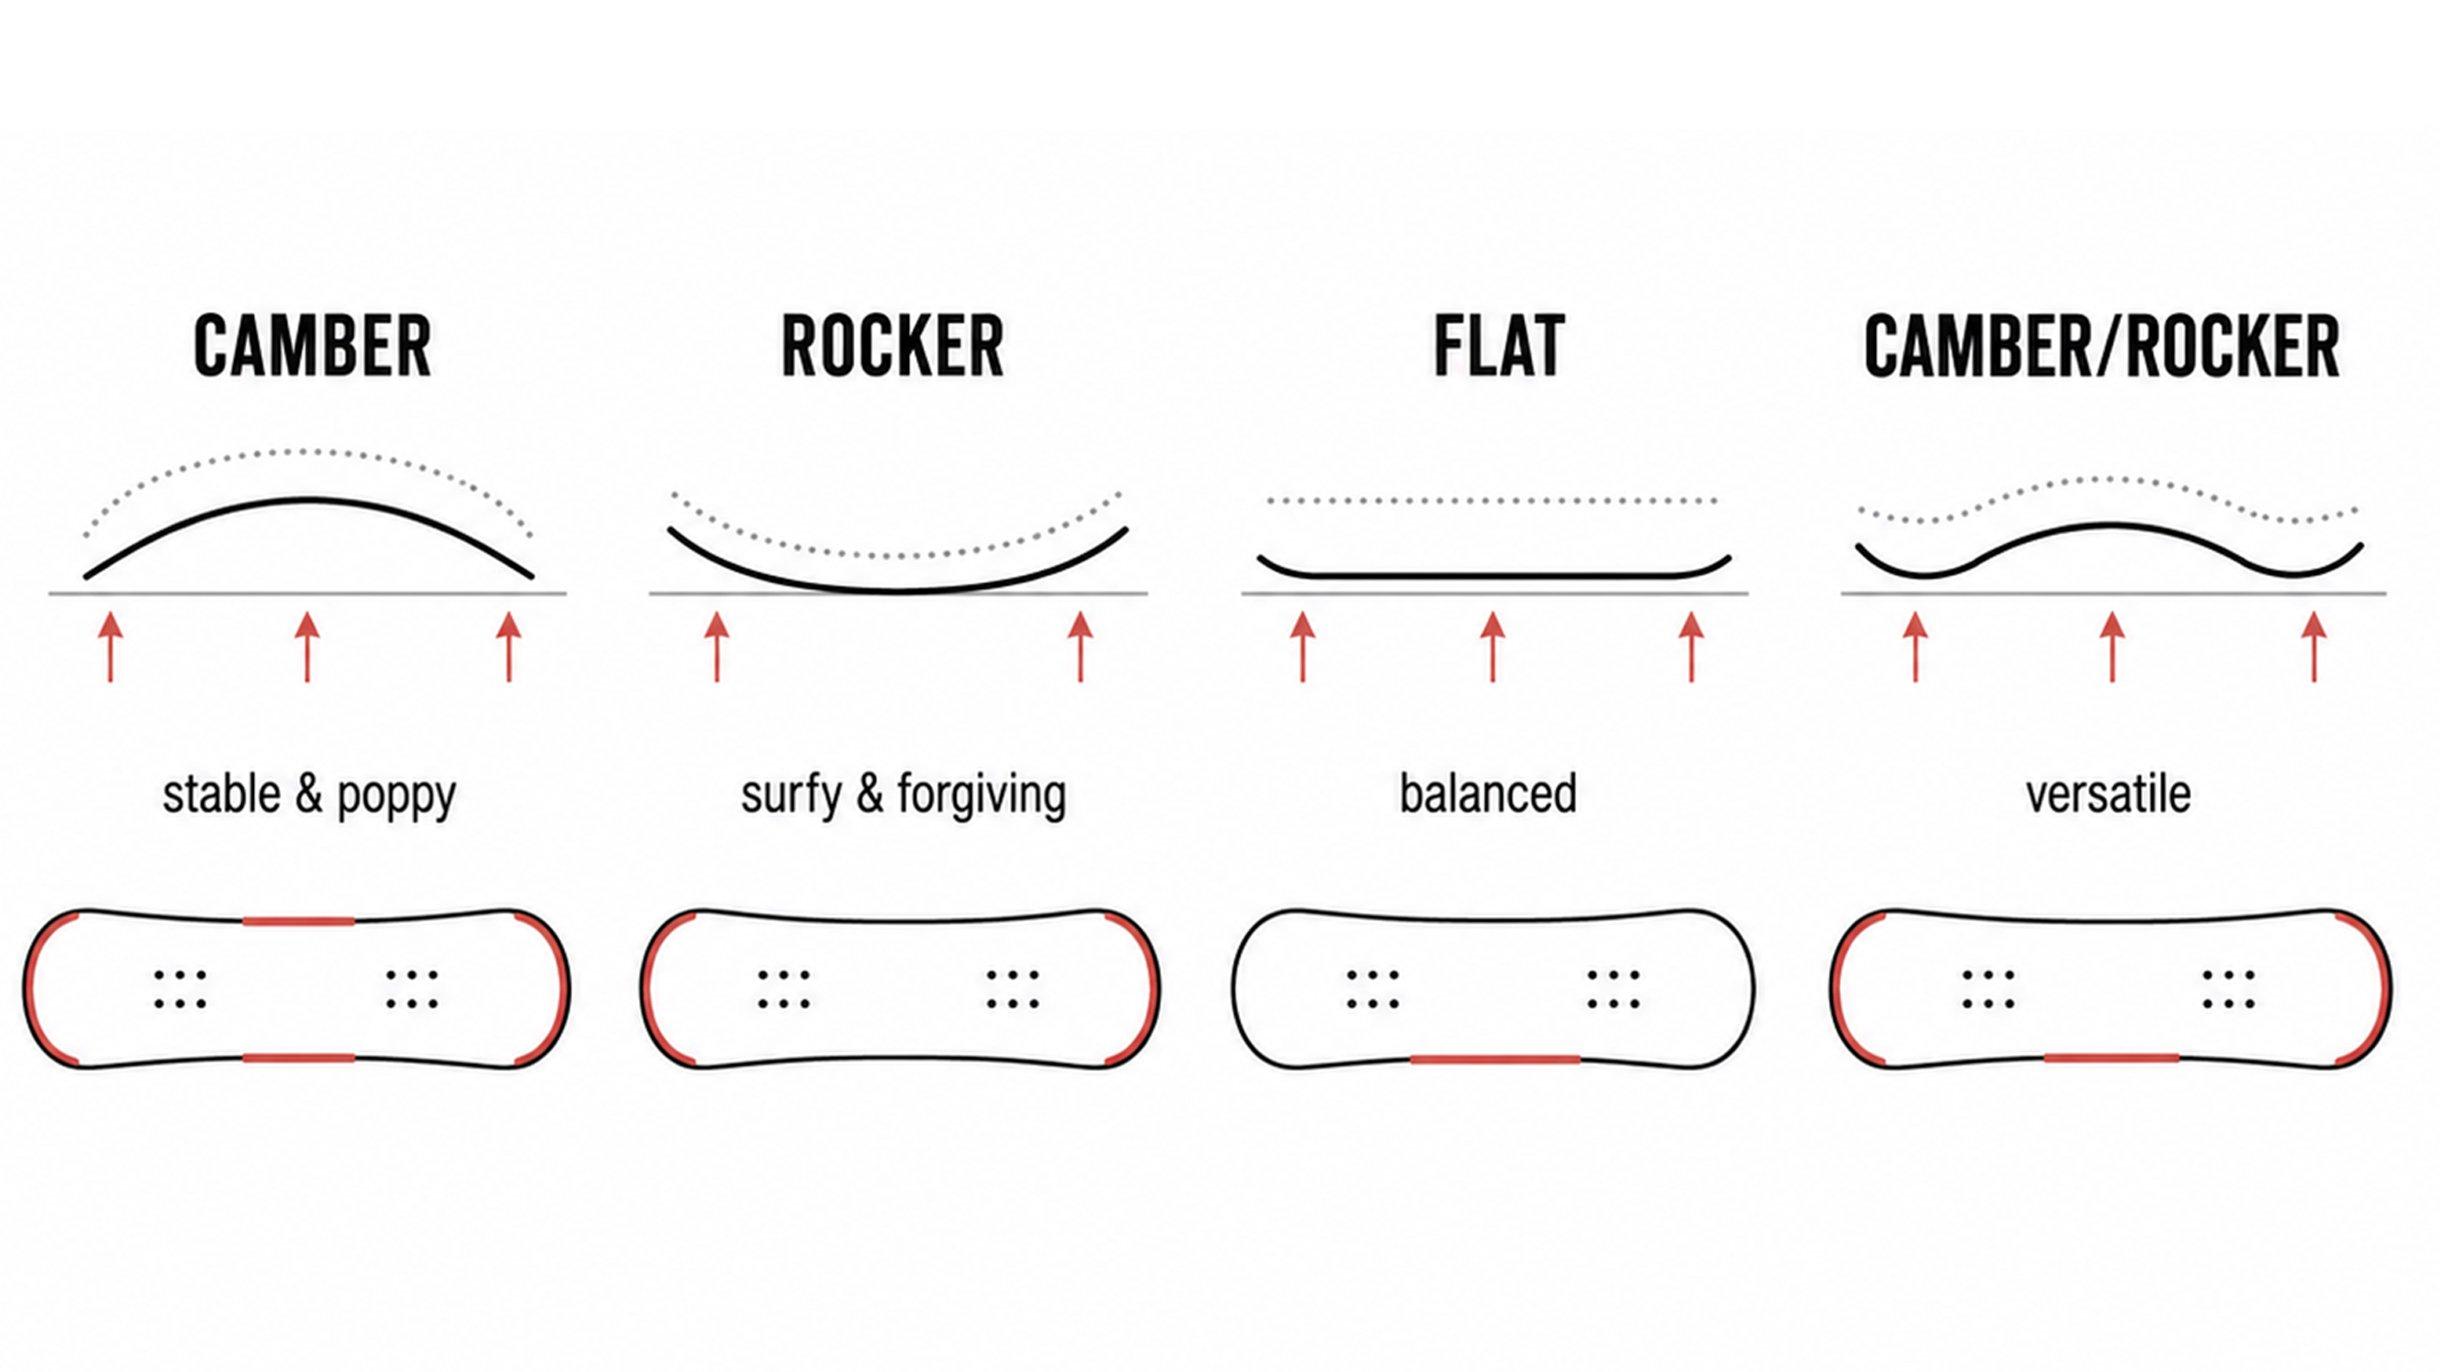
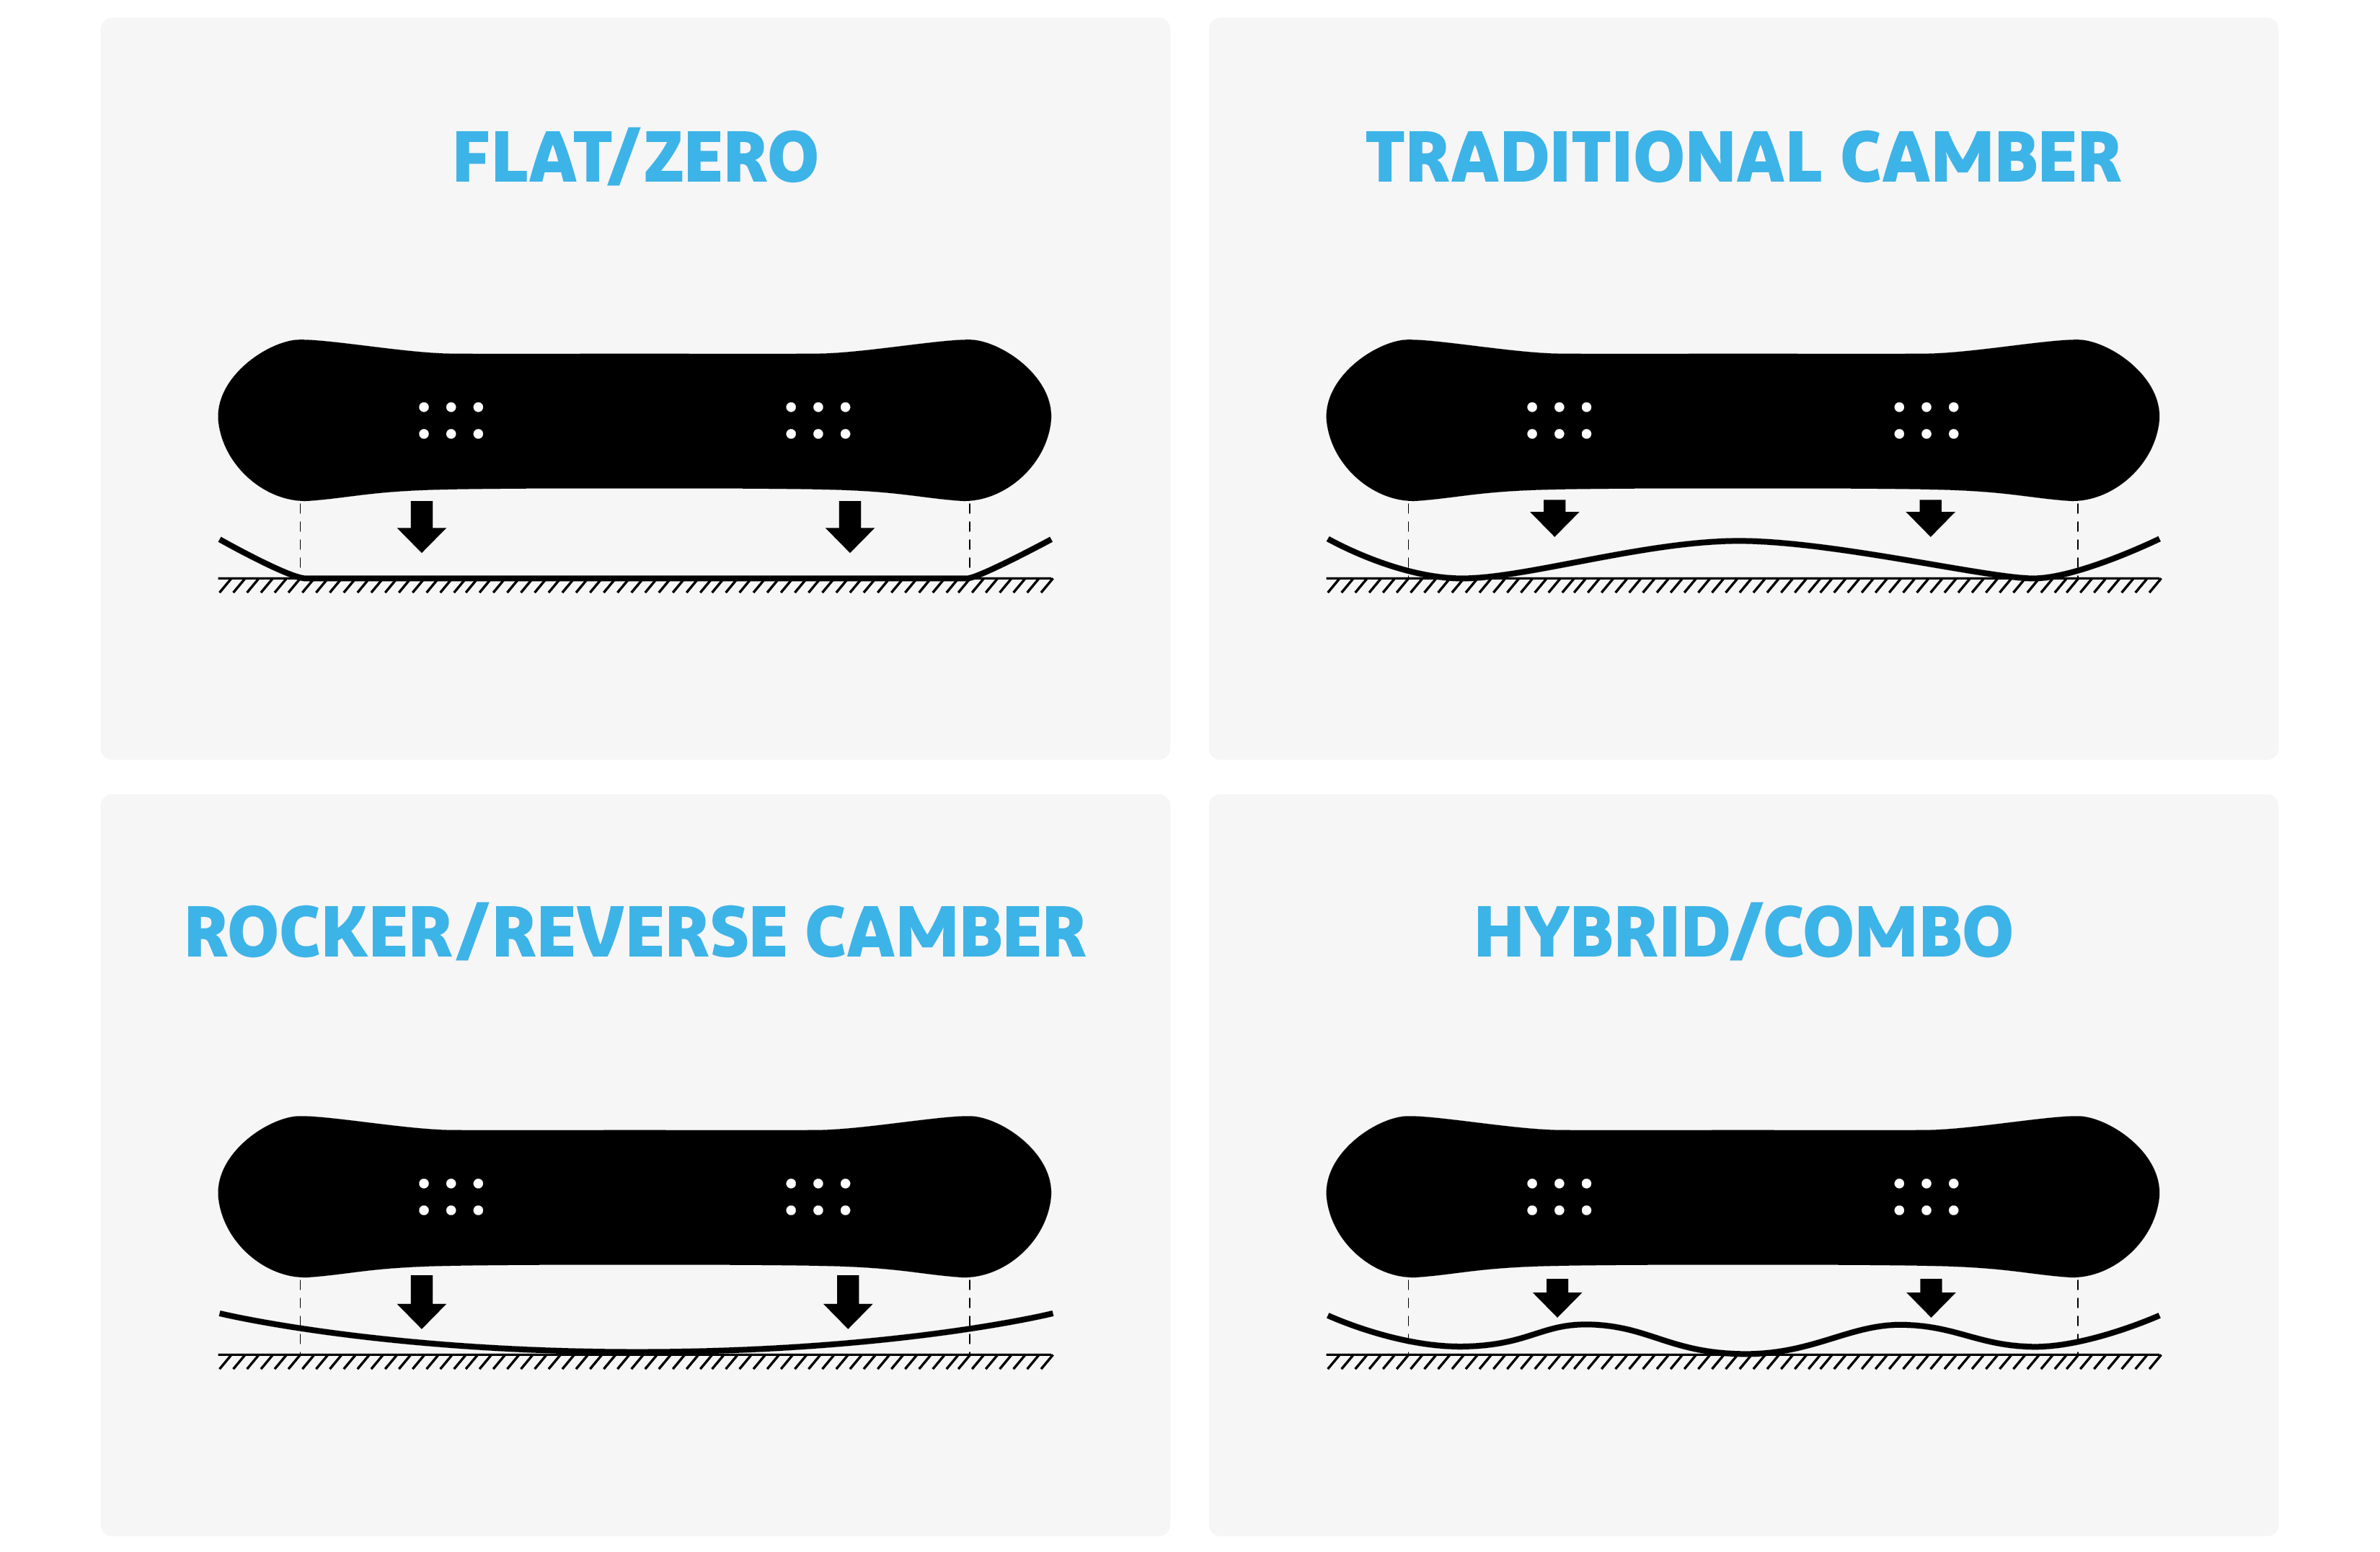
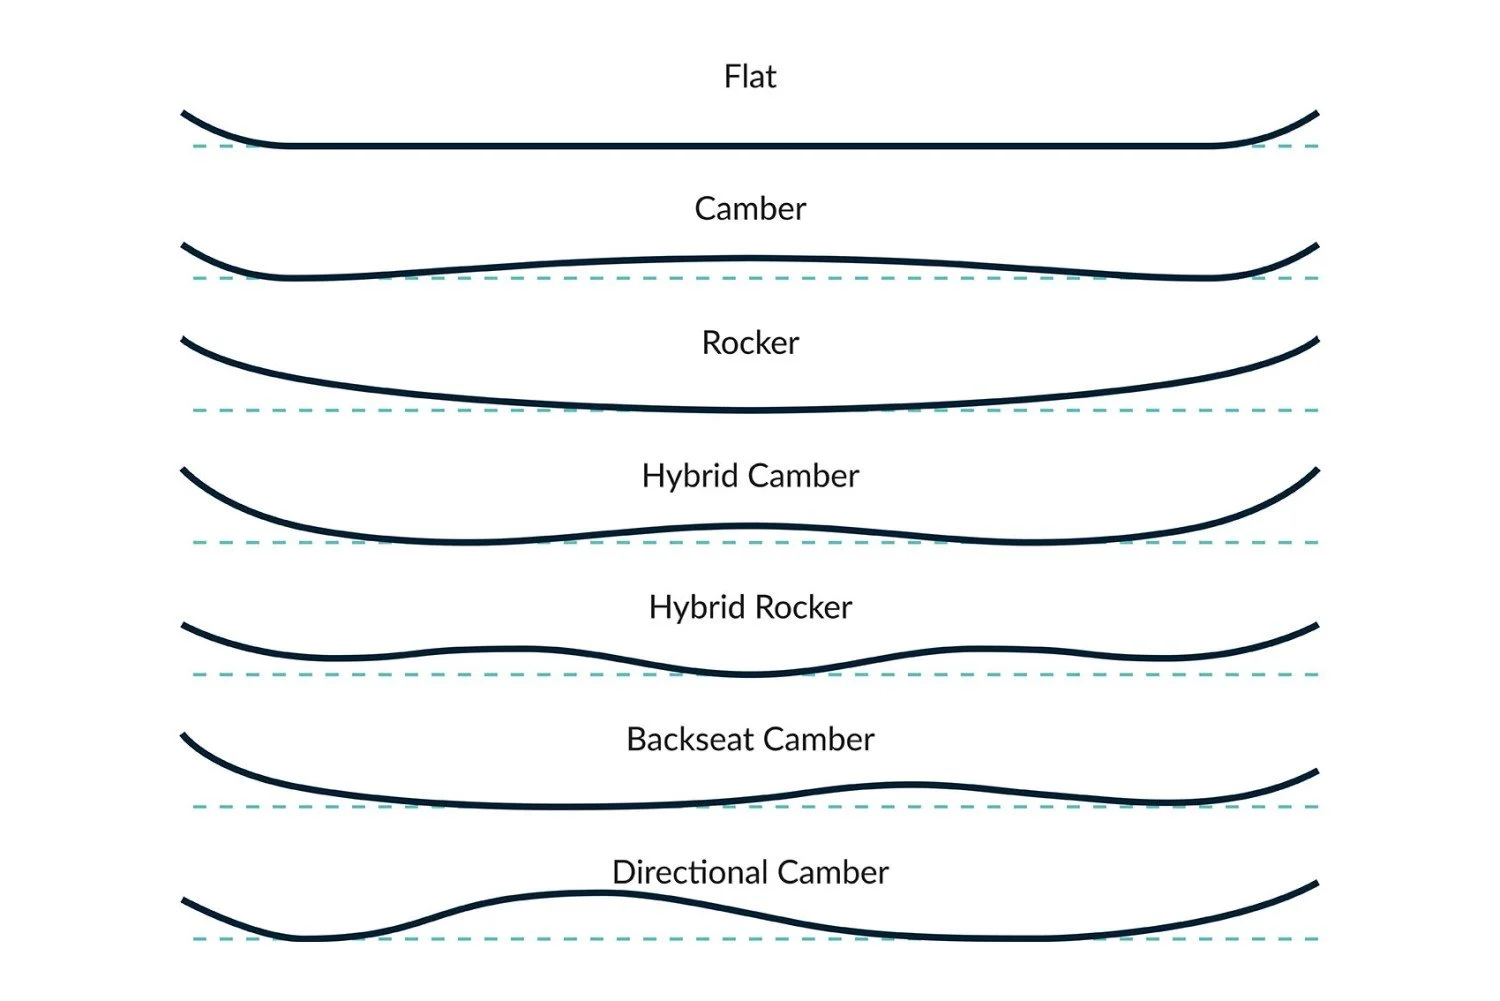
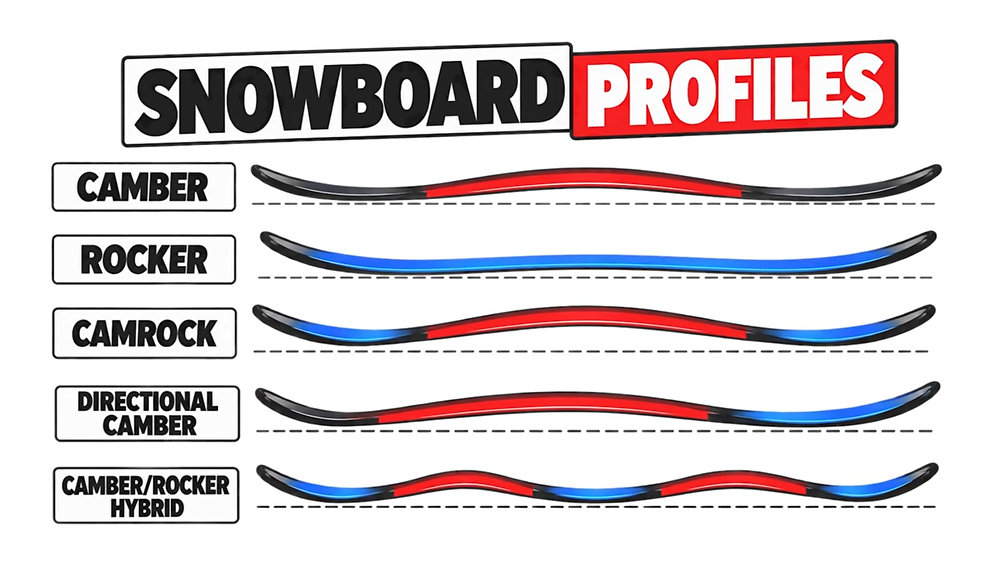
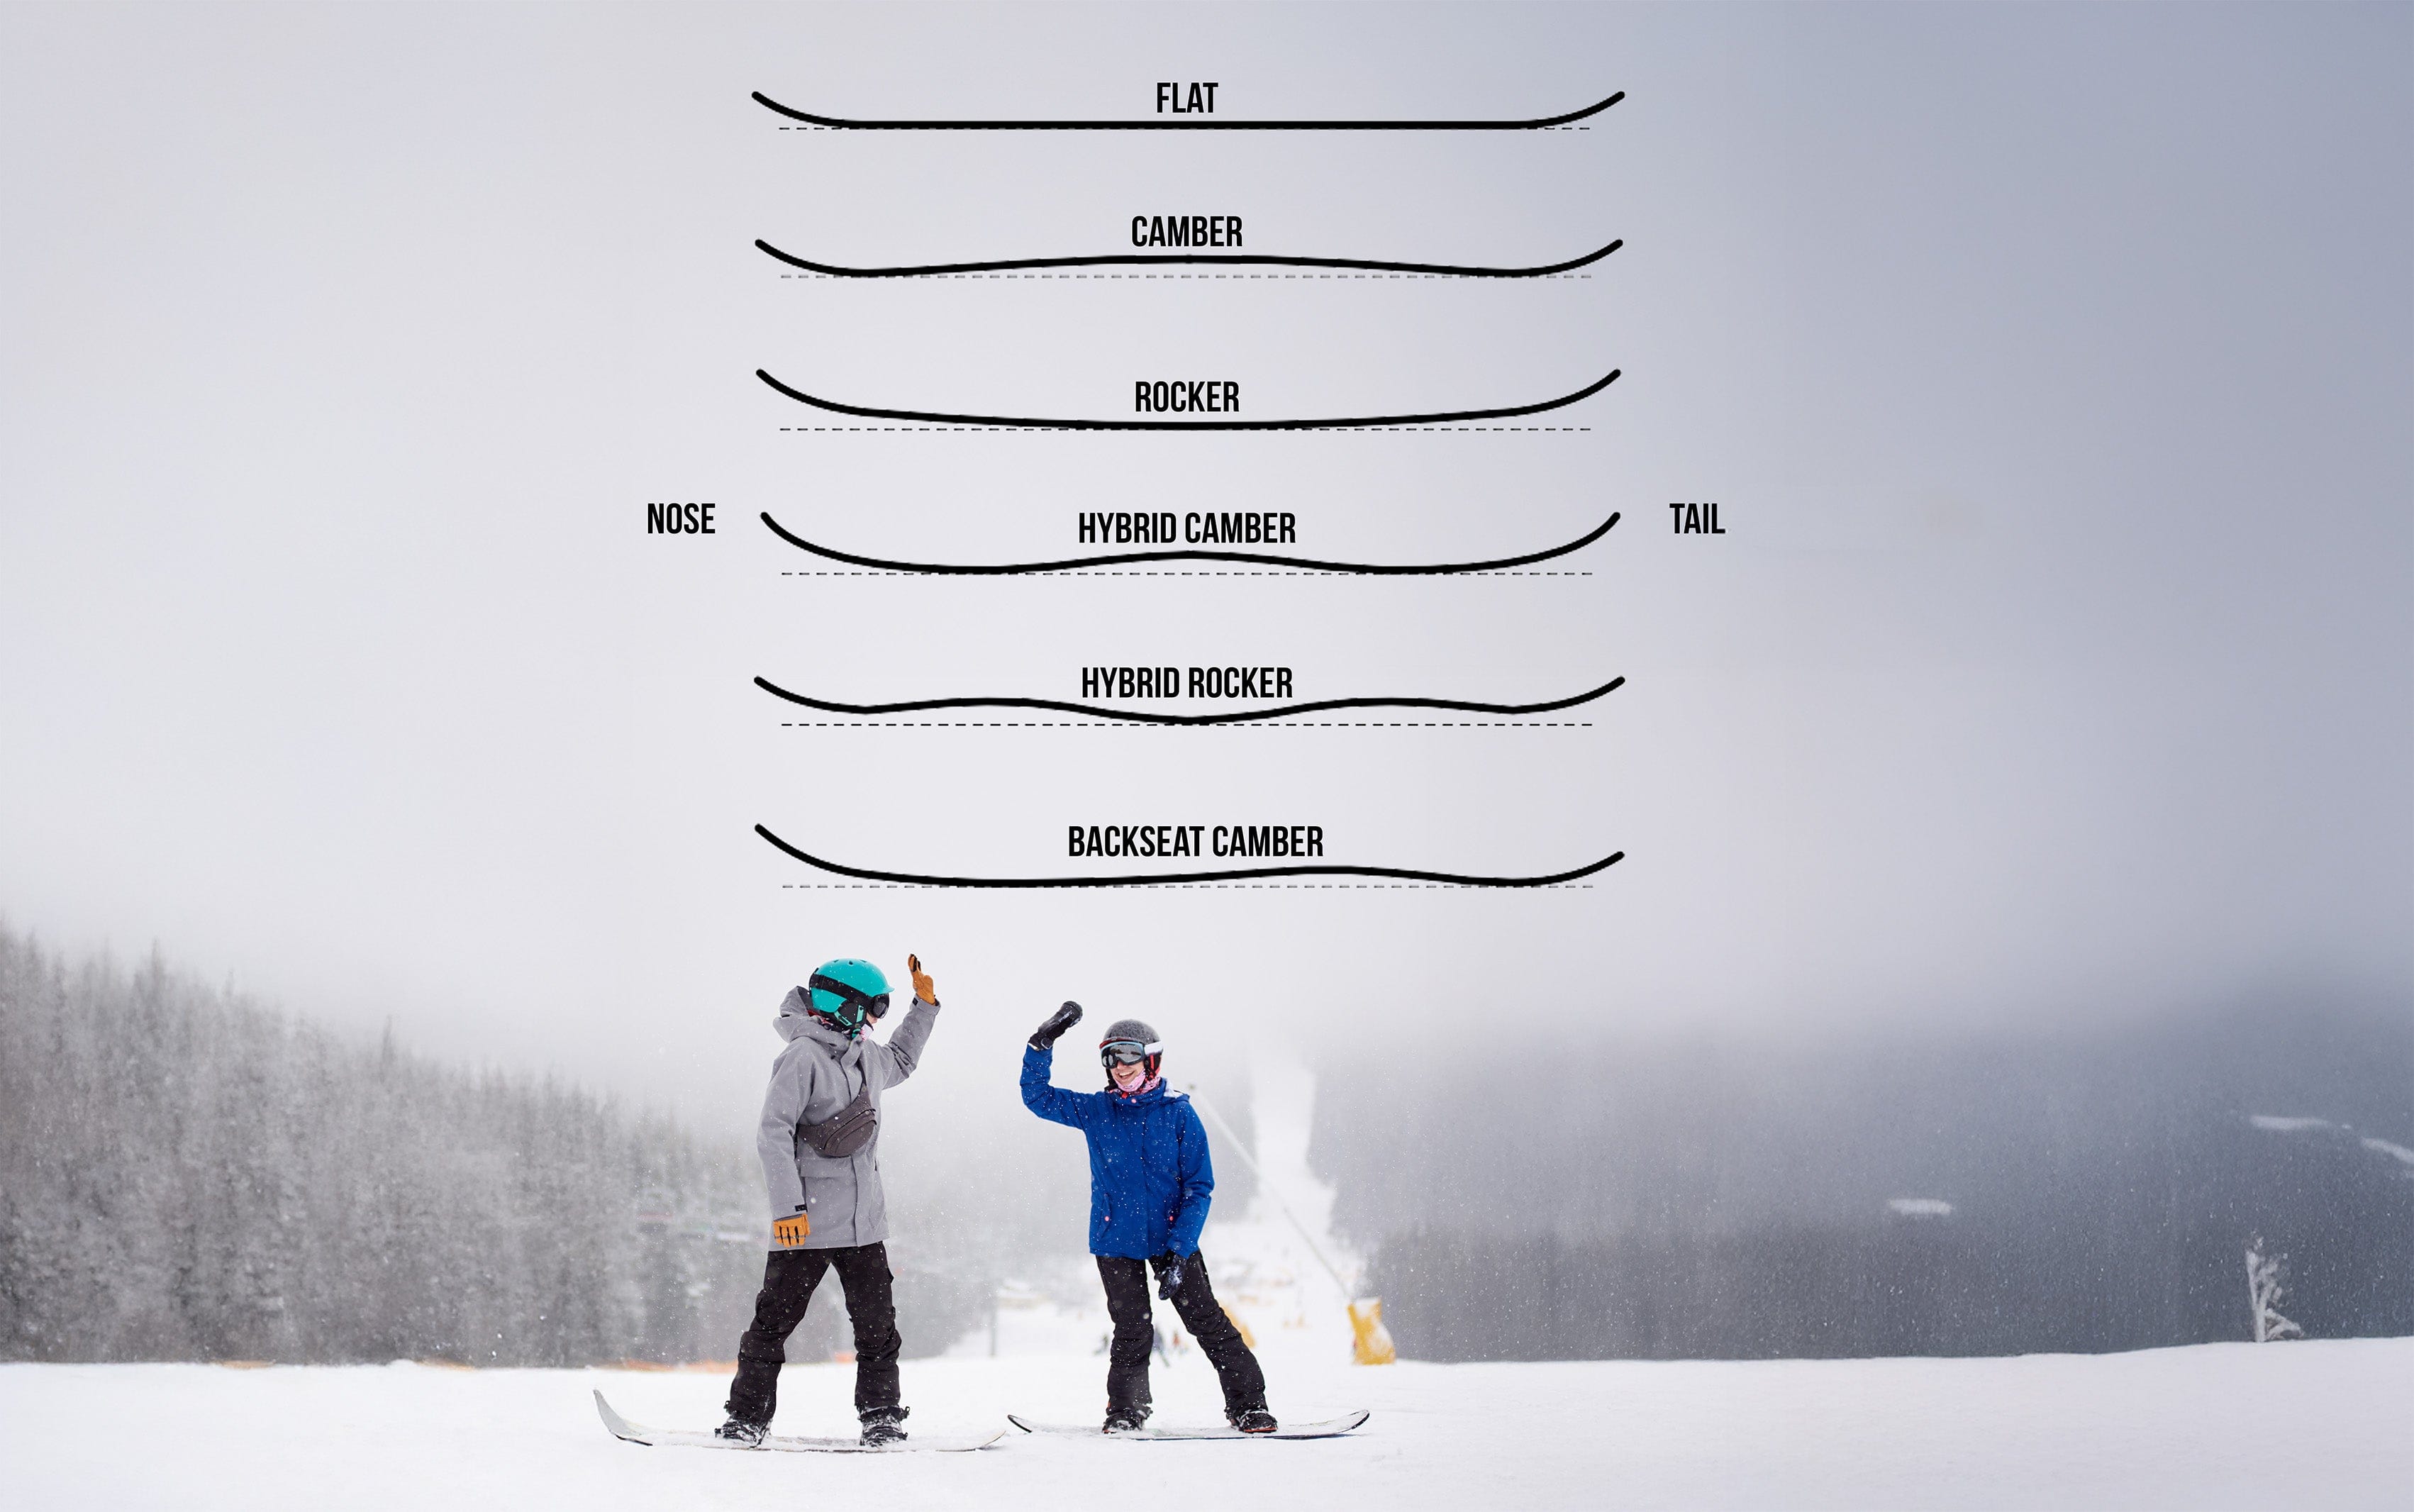
Looking at a board from the side, the shape of the base is called its profile. The two classic shapes are camber and rocker. Most modern boards (including splitboards) use some form of hybrid.
Camber
- Arches upward in the middle
- Tip & tail touch first
- Strong edge hold & pop
- Stable at speed
- More precise & energetic
- Can be less forgiving
- Best for carving & firm snow
Rocker
- Curves upward at tip & tail
- Middle contacts first
- Excellent float in powder
- Easy turn initiation
- Very forgiving / catch-free
- Less edge hold & pop
- Playful & surfy feel
When to choose Camber
- You want maximum edge grip
- You like high-speed carving
- You prefer a more energetic, precise board
- You mostly ride firm or mixed snow
When to choose Rocker
- You ride a lot of deep powder
- You want easy, catch-free turning
- You prefer a playful, surfy feel
- You’re newer or value forgiveness
On splitboards the profile works the same way once the board is locked in ride mode. Many popular freeride and touring splitboards use a hybrid with camber underfoot for grip on the skin track and firm snow, plus rocker in the nose for float in powder.
A Brief History
The idea of cutting a snowboard in half to tour with it appeared in the late 1980s. Early patents exist from Europe (including an Italian one by Nicolò Manaresi in 1990). The version that launched the modern sport came from Brett “Kowboy” Kobernik and Voile’s Mark “Wally” Wariakois. In 1994 they released the first commercial DIY Voile Split Kit.
For years it remained a niche tool for dedicated backcountry riders. The big shift came around 2010 with Jeremy Jones’ influential film Deeper, combined with major improvements in lightweight bindings and board technology. Suddenly splitboarding went from fringe to mainstream within the freeride and backcountry community.
Why Splitboards Are Becoming So Popular
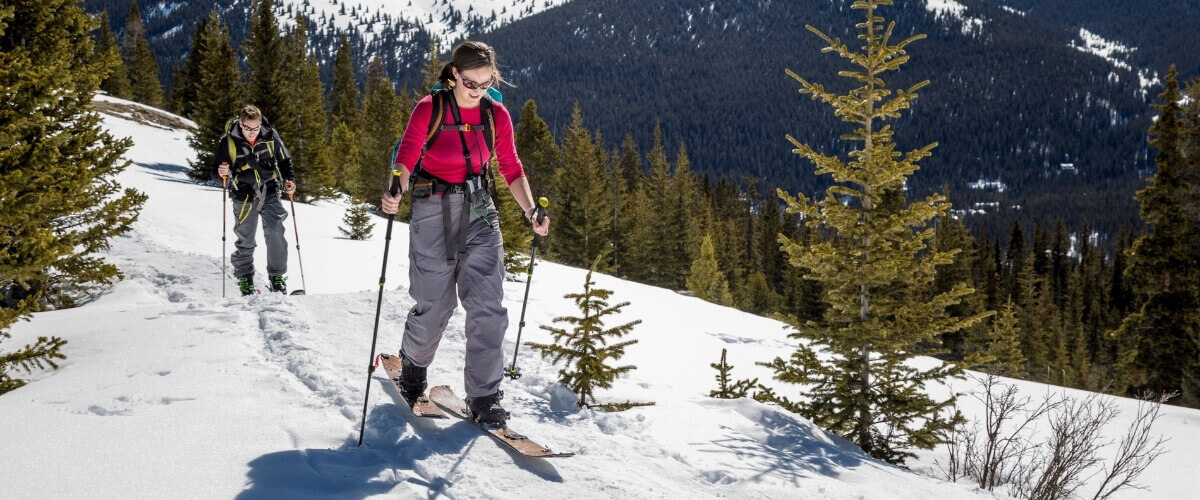
- Escape the crowds and lift lines – Resort tickets are expensive and mountains are packed. Human-powered backcountry offers solitude and untracked snow.
- True freedom of movement – Go where the lifts don’t. Explore entire mountain ranges on your own power.
- Technology has caught up – Modern splitboards ride almost as well as solid boards. Bindings are lighter, transitions are faster, and performance in powder is excellent.
- Snowboarding culture shifted – The freestyle park era gave way to a deeper appreciation for freeride and natural terrain. Jeremy Jones and others made the lifestyle aspirational.
- Health, fitness & outdoor lifestyle – Skinning is a fantastic full-body workout. Many people discovered the joy of human-powered adventure during and after the pandemic.
- More accessible gear – Every major snowboard brand now offers split models. Prices and quality have improved dramatically.
- Environmental preference – Many prefer skinning over snowmobile or helicopter access.
Boot Compatibility – Use Your Own Snowboard Boots
Boot compatibility is straightforward for the majority of riders:
- Soft snowboard boots – Work with nearly all popular splitboard bindings (Spark R&D, Voile, Karakoram, Union Charger, etc.). If your boots fit a normal snowboard binding, they will fit a splitboard binding.
- No new footwear needed – You do not have to buy specialized touring boots. Your existing pair is fine.
- Hard boots / alpine boots – These require a dedicated hardboot splitboard setup (different bindings and often a different board). Most recreational splitboarders stay with soft boots.
- Size and fit – Use the same boot size you already ride. Bindings are adjustable like regular snowboard bindings.
This is one of the biggest reasons splitboards are a more accessible and affordable alternative to ski alp: you avoid the high cost of alpine touring boots, tech bindings, and skis while still being able to tour and ride.
Is a Splitboard Right for You?
Splitboards shine if you want to ride backcountry powder under your own power. They are less ideal if you only ride resorts or primarily want park and pipe. The setup is heavier and more complex than a regular snowboard, and the learning curve for skinning and transitions is real — but the payoff of earning your turns is unmatched for many riders.